How to Make a Custom Keychain from Coffee Beans with Bakeable Clay
If you love coffee and you love making things with your hands, this project was made for you. In this guide, I’ll walk you through exactly how to make a custom keychain using real coffee beans and oven-bake polymer clay. It’s a simple, budget-friendly craft that produces a genuinely one-of-a-kind result — no two coffee beans look exactly alike, so no two keychains ever will either.
This DIY keychain project is perfect for coffee lovers, craft beginners, and anyone looking for a heartfelt handmade gift. A coffee keychain shaped like a heart, made by your own hands, says a lot more than anything you could buy off a shelf. Let’s get into the materials, the step-by-step process, and the tips that will help you avoid the most common mistakes.
Why Make Your Own Coffee Keychain?
There’s something satisfying about carrying around a small object you made yourself. A handmade custom keychain isn’t just a functional accessory — it’s a tiny piece of art you can hold in your pocket every day. Coffee beans bring a rustic, aromatic charm to any craft, and when they’re paired with polymer clay, they create a textured, realistic look that resin or plastic simply can’t replicate.
This project also happens to be one of the easiest ways to turn a handful of pantry items into a genuinely thoughtful gift. Whether you’re crafting for yourself, a coffee-obsessed friend, a coworker, or a barista you appreciate, a DIY keychain made from coffee beans feels personal in a way that store-bought items rarely do. It’s inexpensive, it doesn’t require any special equipment beyond a couple of basic tools, and it can be finished in an afternoon.
Materials You’ll Need
Before you start, gather everything so the process goes smoothly. Here’s what you’ll need to make your own coffee keychain:
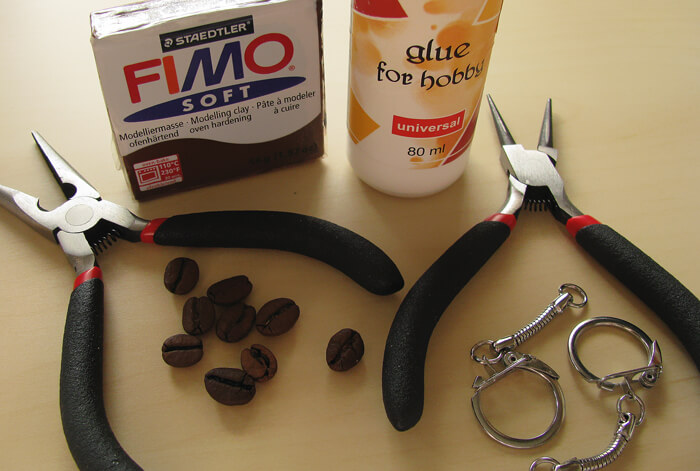
- Keychain hardware (a metal ring and clasp)
- Strong craft glue (a universal hobby glue works well)
- Brown polymer clay (soft oven-bake clay, such as Fimo Soft)
- Whole coffee beans (choose a few with a nice, even shape)
- Round-nose pliers (for shaping and creating holes)
- A second pair of pliers (round-nose or a combination pliers work fine)
You don’t have to use brown Fimo clay specifically, and any strong hobby glue will do the job. These are simply the materials that have worked well and held up over time in this kind of project. If you’re not sure where to start, it can help to search for polymer clay starter kits and jewelry-making pliers to see what’s available:
- Browse oven-bake polymer clay options
- Browse jewelry-making round-nose pliers
- Browse keychain hardware rings and clasps
- Browse strong craft glue for polymer clay
Having good tools on hand makes a real difference. A cheap, flimsy pair of pliers can slip and squash your careful clay shape right before baking, so it’s worth investing in a decent pair if you plan on making more than one custom keychain.
Step-by-Step: Shaping the Clay
I spent some time thinking about what shape would work best for this DIY keychain, and I landed on a classic heart shape. It’s simple enough for a beginner to pull off, but it still takes a little bit of care and patience to get right.
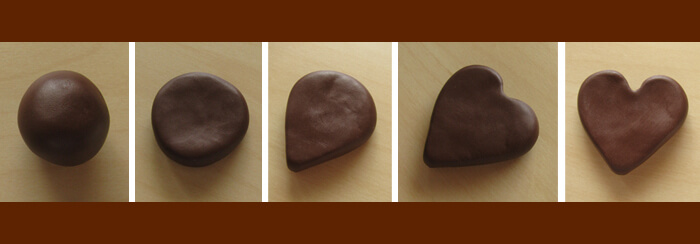
Step 1: Warm up the clay. Break off a small piece of polymer clay and roll it into a ball between your palms. This isn’t just about shaping — the warmth from your hands actually softens the clay and makes it much easier to mold. Cold clay is stiff and prone to cracking, so don’t skip this step even if you’re excited to get to the fun part.
Step 2: Flatten into a disc. Once the ball feels soft and pliable, flatten it into a round disc shape. Try to keep the thickness even all the way around — about a quarter-inch is a good target for a keychain that will hold up over time without becoming too heavy or too fragile.
Step 3: Shape it into a teardrop. Gently press one side of the disc inward and pull the clay slightly to form a flattened teardrop shape. This is the foundation your heart will be built on.
Step 4: Form the heart’s dip. Take the wider, rounded end of the teardrop and press the center inward with your finger or thumb. This is the step that actually creates the classic heart shape. If shaping it by hand feels tricky, this is exactly where your round-nose pliers come in handy — use the tip to gently push the clay inward toward the point of the heart until the dip looks natural.
Pro tip: Don’t rush the heart shape. If it looks a little lopsided, that’s completely normal on your first try. You can always smooth and reshape soft clay multiple times before it’s cured, so take your time and adjust as needed.
Adding the Coffee Beans to Your Coffee Keychain
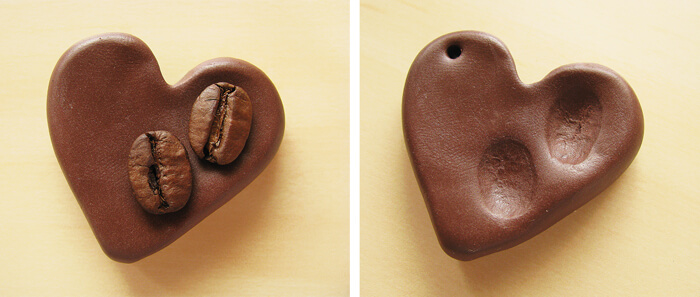
Once your heart shape is ready, it’s time to bring in the star ingredient. Pick out two well-shaped coffee beans — ones with a nice curve and a clean crease down the middle tend to look the best once pressed into the clay.
Gently press the beans into the surface of the heart, positioning them so they look balanced and centered. Be careful not to distort the heart’s outline while pressing them in — if the edges start to warp, simply smooth them back into shape with your fingers.
Next, grab your round-nose pliers again. This time, you’ll use them to poke a small hole through the top of the heart, right where you want the keychain hardware to eventually attach. Make the hole clean and slightly wider than you think you need, since polymer clay can shrink or shift slightly during baking.
Here’s an important step that trips up a lot of beginners: carefully remove the coffee beans from the clay before baking. Take note of exactly where each bean was positioned and which bean went where, since you’ll want to recreate that placement later. Removing the beans before the clay goes into the oven means there’s no chance of the coffee scorching, burning, or darkening further under heat. Baking whole coffee beans alongside the clay might seem like a shortcut, but it almost always leads to an overly dark, brittle, or unpleasant-smelling result.
Baking the Clay Keychain Shape
Now comes the part where your soft clay becomes a durable, long-lasting DIY keychain base. Preheat your oven to about 230°F (110°C) and bake the clay heart for around 30 minutes.
When you first take it out of the oven, the clay might still feel a little soft to the touch — that’s normal. As it cools, it will continue to harden, and within a short while it should feel completely solid and sturdy. Always let the piece cool fully on a heatproof surface before handling it too much, since warm polymer clay is more flexible and can dent or scratch easily.
A quick word of caution: oven temperatures can vary quite a bit from one appliance to another, so keep an eye on your clay the first time you try this. If your oven tends to run hot, check on the clay a few minutes early to avoid overbaking, which can cause discoloration or brittleness. If you want more consistent results across projects, an oven thermometer is a small investment that pays off:
Gluing the Coffee Beans in Place
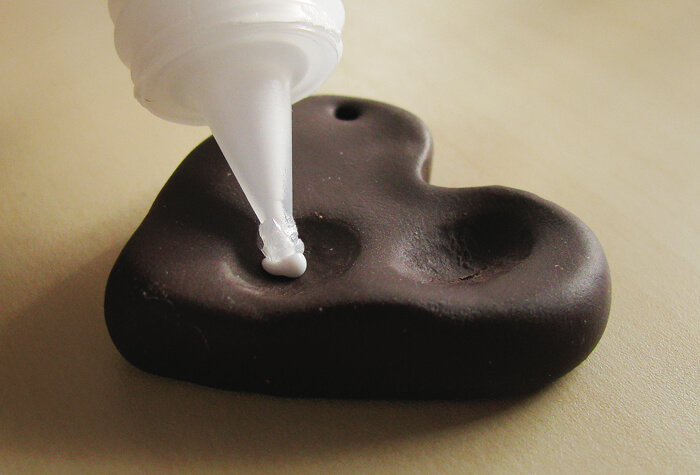
Once your clay heart has cooled completely and hardened, it’s time for the most satisfying part of making this custom keychain: gluing the coffee beans back into position.
Apply a small dot of strong craft glue into each indentation left behind from where the beans originally sat. Then carefully press each coffee bean back into its matching spot, using the shape of the indentation as your guide. Press firmly but gently — you want good contact between the bean and the clay without cracking either surface.
Let the glue set completely before moving on to the next step. This usually takes anywhere from a few minutes to an hour depending on the glue you’re using, so check the product instructions and don’t rush it. A bean that pops loose later because the glue wasn’t fully cured is one of the most common (and most avoidable) disappointments in this project.
Attaching the Keychain Hardware
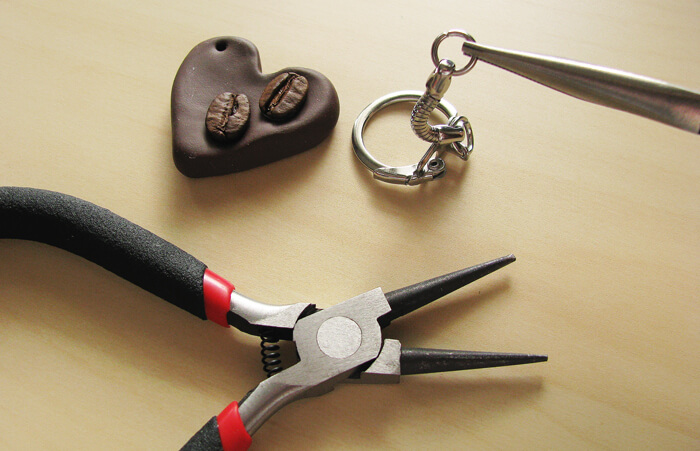
For the final step, you’ll attach the keychain ring and clasp through the hole you created earlier. This is where having two pairs of pliers really pays off — one pair to hold the small jump ring steady, and the other to open and close it around the hole in the clay heart.
Gently open the jump ring sideways (never pull it directly apart, which can permanently warp the metal), slide it through the hole in your clay piece, and then close it back up securely. Attach your keychain clasp to the other end of the ring, and your coffee keychain is officially complete.
Common Mistakes to Avoid
Making a custom keychain out of coffee beans and polymer clay is a fairly forgiving project, but there are a handful of pitfalls worth knowing about ahead of time:
- Skipping the warm-up step. Cold, stiff clay is much harder to shape and more likely to crack. Always warm it in your hands first.
- Baking the coffee beans along with the clay. This can scorch the beans, darken them unattractively, and even create an unpleasant burnt smell in your kitchen.
- Making the attachment hole too small. Clay can shift slightly during baking, so a hole that seemed generous beforehand might end up too tight afterward.
- Rushing the glue-drying time. Attaching hardware or handling the piece before the glue fully cures is the most common reason beans come loose later.
- Using flimsy pliers. Poor-quality tools can crush your careful shaping work or fail to open jump rings cleanly.
- Overbaking the clay. Keep an eye on both the temperature and the time, since ovens vary and overbaked clay can become brittle or discolored.
Avoiding these few missteps will make the difference between a keychain that looks a little rough around the edges and one that looks genuinely professional.
Variations to Try
Once you’ve made your first heart-shaped coffee keychain, you’ll probably want to experiment with other shapes and styles. A few ideas that work particularly well with the same coffee bean and clay technique:
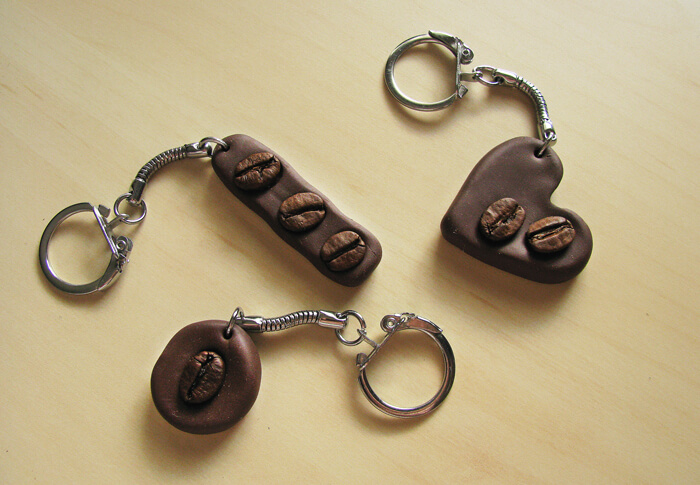
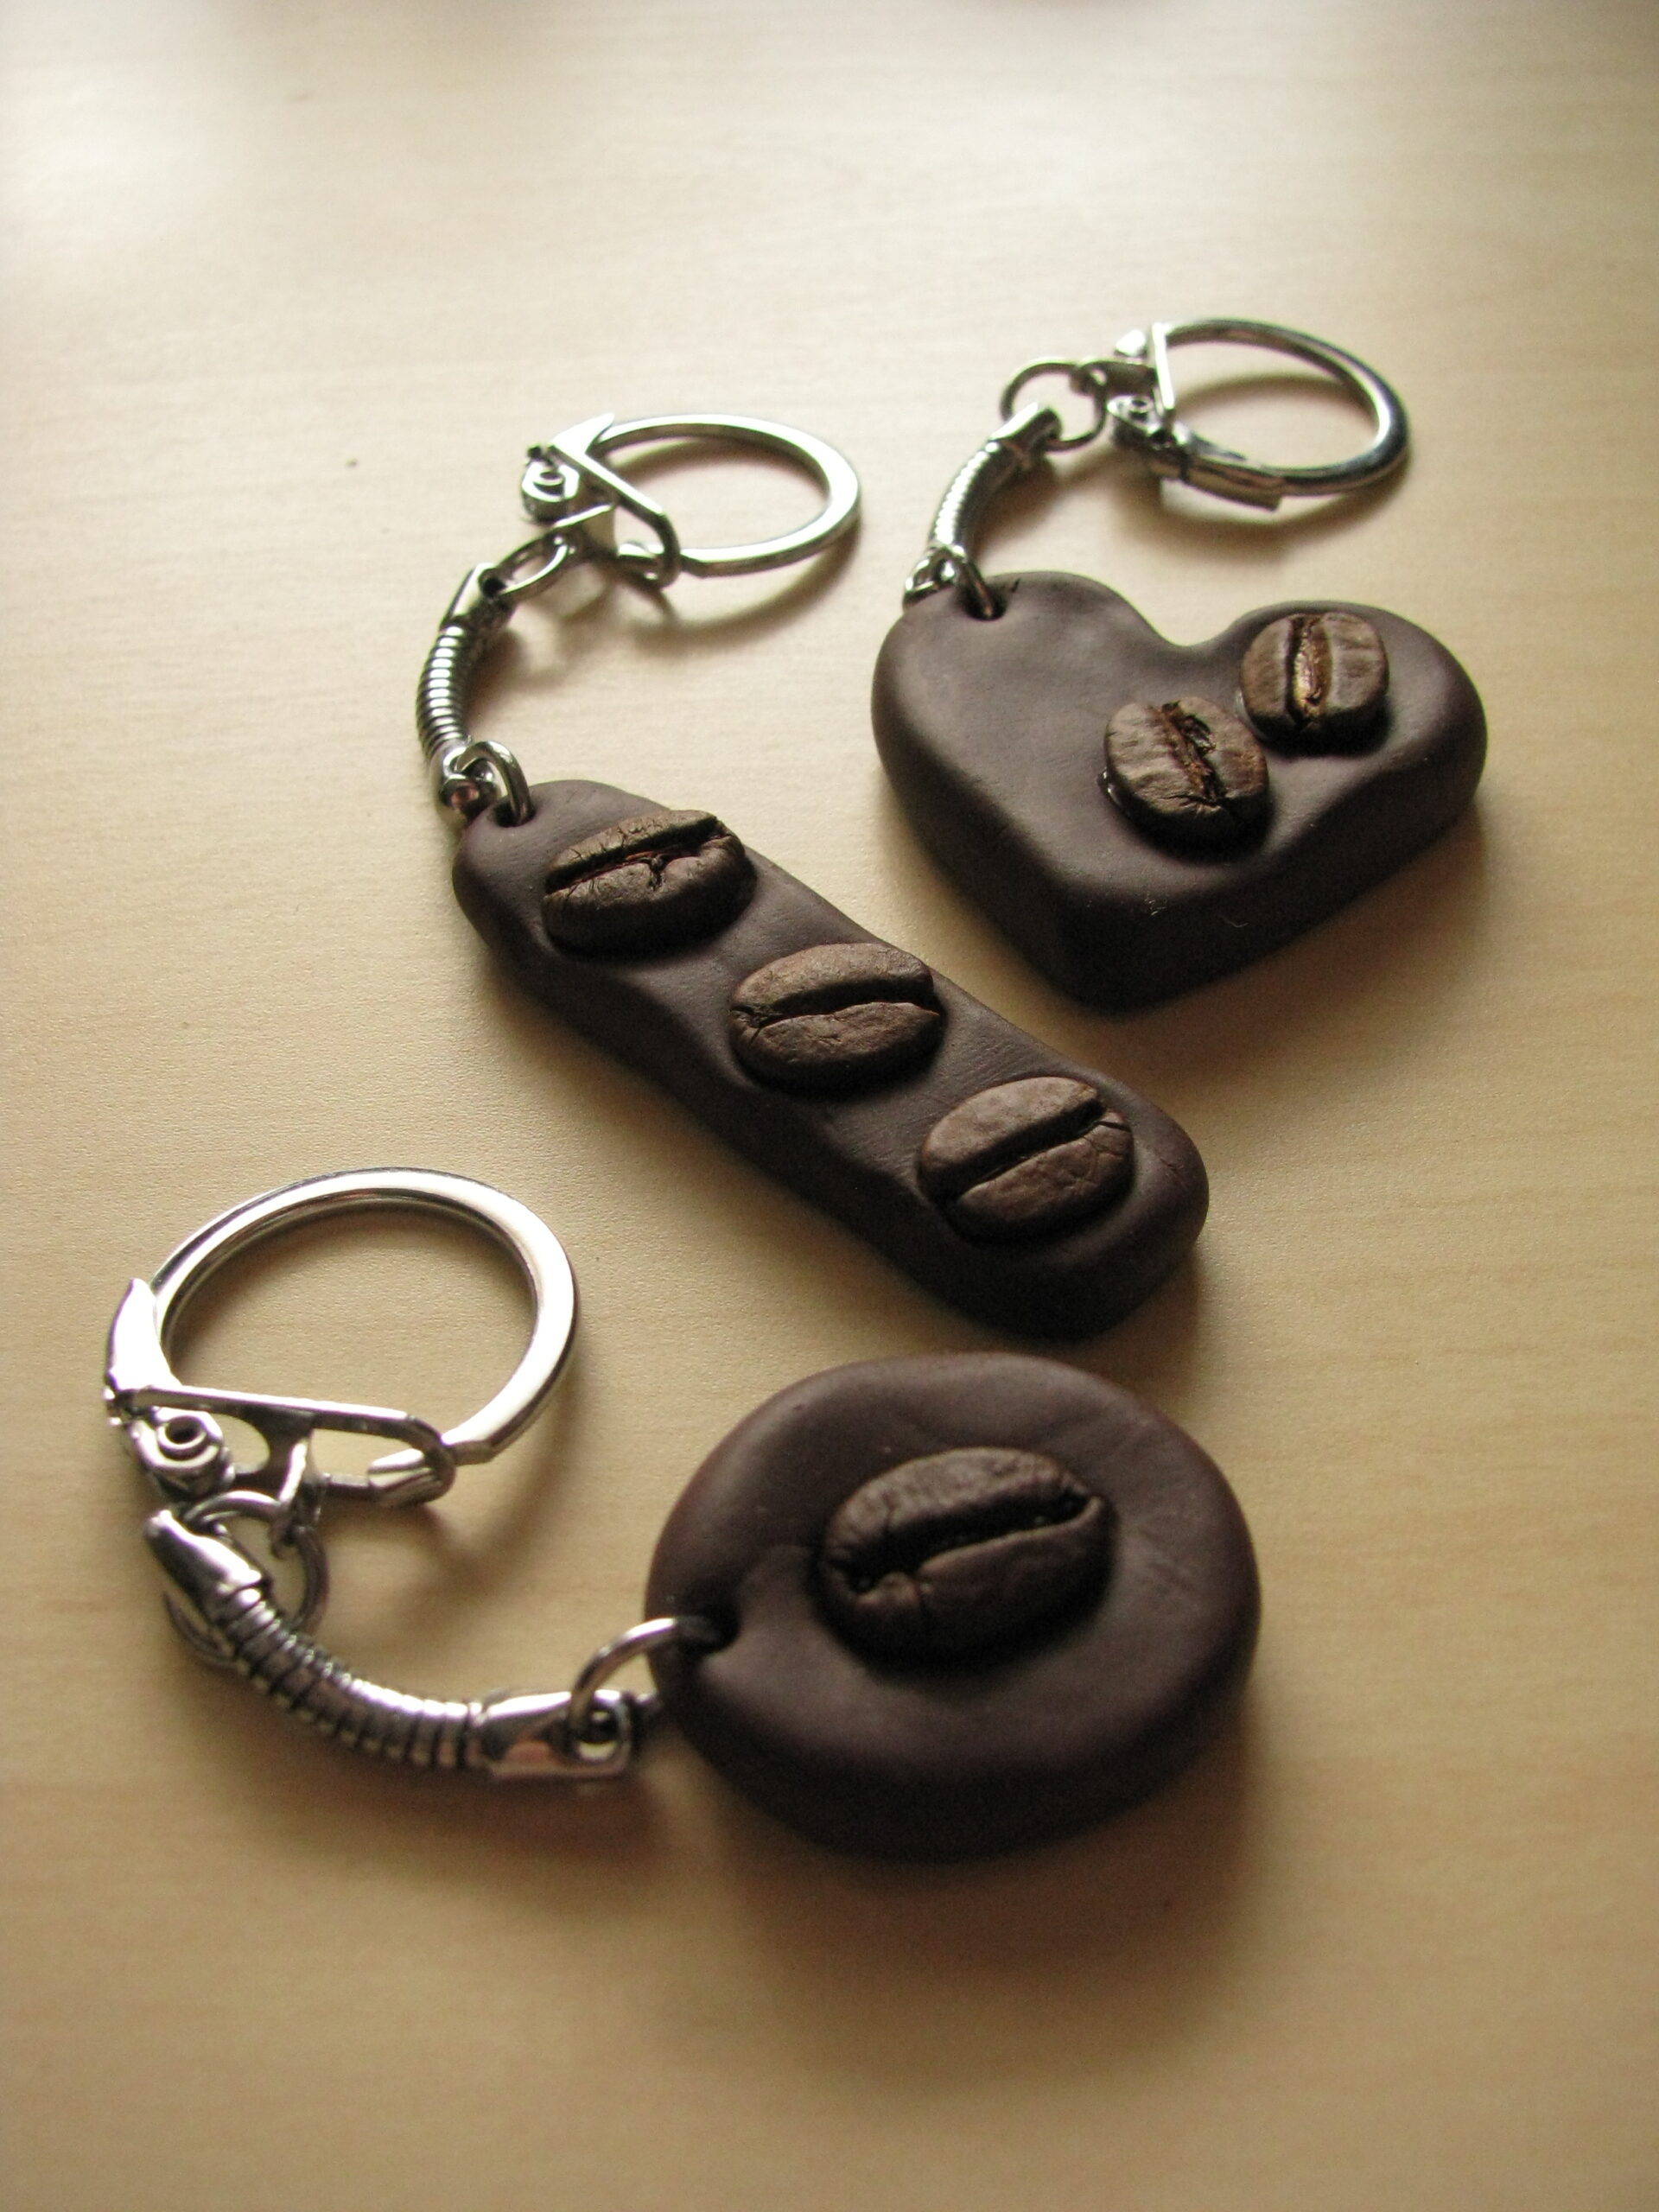
- A simple round disc with a single coffee bean pressed into the center — minimalist and quick to make.
- An elongated rectangle with three or four beans lined up in a row, resembling a little coffee bar.
- Small circular pendants that can double as bag charms instead of keychains.
- Different clay colors, like a deep espresso brown, a creamy latte tone, or even a fun contrasting color for a more playful look.
Because this is such a flexible technique, it’s easy to make a whole matching set — one for yourself, and a few more to give away as gifts.
Gift Ideas for Your Coffee Keychain
A handmade DIY keychain like this makes a wonderful small gift for almost any occasion. Consider making a batch for:
- Coffee-loving friends and family members, especially around birthdays or the holidays
- Coworkers or bosses, as a thoughtful desk-friendly gift
- Baristas at your favorite local coffee shop, as a small thank-you
- Wedding or party favors, if you’re hosting a coffee-themed event
- Care packages, since these keychains are lightweight and easy to mail
Because each bean has its own natural shape and pattern, every single custom keychain you make will look slightly different — which is part of what makes them feel so personal.
Frequently Asked Questions
Do I need special tools to make a coffee bean keychain? Not really. A basic pair of round-nose pliers and a second pair for opening jump rings are the only specialized tools required. Everything else — clay, glue, and coffee beans — is easy to find at a craft store or online.
Can I use a different clay color instead of brown? Absolutely. Brown clay simply complements the natural tone of coffee beans, but you can experiment with other colors for a different aesthetic.
Will the coffee beans smell like coffee once finished? Real coffee beans do retain a subtle coffee scent for a while, adding a nice sensory touch to the finished piece, though this will fade gradually over time as the beans are sealed with glue.
How long does this project take from start to finish? Including the baking and cooling time, most people can complete a single coffee keychain in about an hour to an hour and a half of active work, though the clay itself needs time to cool undisturbed.
Is this a good beginner-friendly craft project? Yes. This is one of the more approachable polymer clay projects out there. The shaping technique is forgiving, the materials are inexpensive, and mistakes are easy to fix before the clay is baked.
Final Thoughts
Making your own custom keychain out of coffee beans and oven-bake clay is a wonderfully simple way to turn everyday materials into something meaningful. The process is quick, the materials are affordable, and the final result has a warmth and character that mass-produced accessories just can’t match. Whether you keep your finished coffee keychain for yourself or give it away as a gift, it’s a small project with a genuinely satisfying payoff.
Once you’ve made your first one, don’t be surprised if you find yourself reaching for the clay again — this is exactly the kind of DIY keychain project that’s easy to fall in love with, one coffee bean at a time.