DIY Coffee Bean Advent Wreath: Easy Step-by-Step Guide
The weeks leading up to Christmas are among the coziest of the year: twinkling lights, familiar scents, slower evenings, and family traditions. And nothing sets the mood quite like a handmade advent wreath glowing on the table. If you love coffee, this year’s DIY advent wreath is for you: a coffee bean advent wreath that smells wonderful, looks stunning, and is completely one of a kind.
A homemade advent wreath is more than decor. It is a little project that fills your home with the aroma of roasted coffee mixed with classic holiday scents, so December feels like sitting in a cozy café. This guide covers everything you need to know:
- What materials to buy for a DIY advent wreath
- How to assemble it, step by step
- Tricks that make it last and look polished
- Safety rules for candles on an advent wreath
- Three design variations beyond classic red
- Common mistakes to avoid
Quick facts: Time needed: 1 to 2 hours. Skill level: beginner. Estimated cost: $20 to $40. Best made: in mid to late November. Advent 2026 begins on Sunday, November 29 (the fourth Sunday before Christmas), so you have plenty of time.
What Is an Advent Wreath?
An advent wreath is a circular arrangement holding four candles, one for each Sunday of Advent, the four-week countdown to Christmas. The tradition began in 19th-century Germany and is now popular worldwide, in both religious and purely decorative forms. You light one candle on the first Sunday, two on the second, and so on, until all four are burning in the final week before Christmas. A circle has no beginning or end, which is why it has long symbolized continuity and hope.
Traditional wreaths use evergreen branches, which dry out and drop needles within a few weeks. A coffee advent wreath takes a different route, and that is exactly why it works so well.

Why Make a Coffee Bean Advent Wreath?
1. It smells amazing
Roasted coffee beans release a warm, chocolatey aroma. It begins while you craft and lingers for weeks, and it blends beautifully with cinnamon, orange peel, and vanilla.
2. It lasts longer than an evergreen wreath
Coffee beans, sisal, and ribbon don’t wilt, shed, or turn brown. With proper storage, a DIY advent wreath like this can come out year after year. Just refresh a few decorations and it looks new again.
3. It makes a great personal gift
Know a coffee lover? A handmade coffee bean wreath is a gift they will remember, especially paired with a bag of good beans.
4. It’s budget-friendly and sustainable
You don’t need premium beans. Expired, stale, or inexpensive coffee beans work perfectly, so this craft gives leftover coffee a second life.
5. It looks modern
Dark brown beans, cream sisal, and red accents create a minimalist yet unmistakably festive look.
Materials for a DIY Advent Wreath
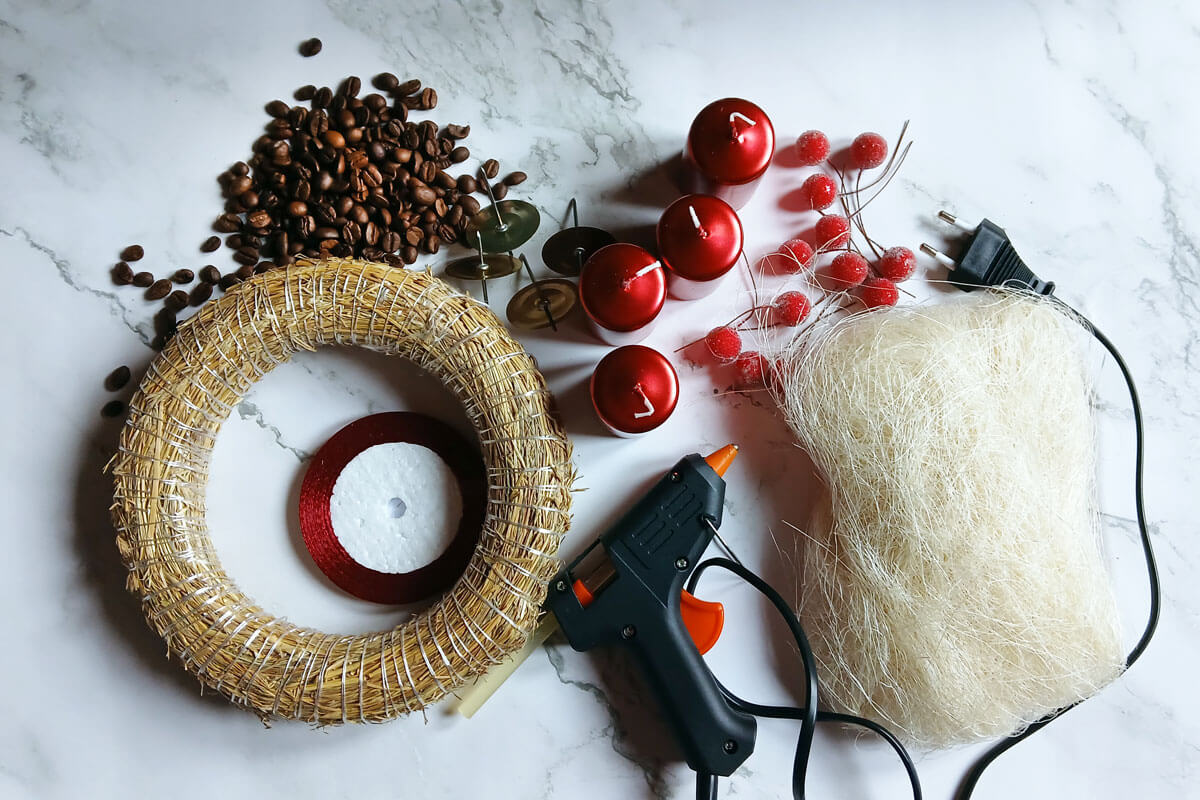
This list creates a classic red, cream, and brown advent wreath, like the one in the photo above. Prices are approximate and vary by store.
| Item | Quantity | Notes |
|---|---|---|
| Straw or foam wreath base | 1 (about 12 inches) | I used straw because it feels more natural; foam is lighter and works too. |
| Coffee beans | About 1 to 1.5 cups | Dark roast, medium to large beans. Dark, glossy beans show off red decor best. |
| Taper or pillar candles | 4 | Red or burgundy looks most striking. I used 2-inch-wide metallic red pillars. |
| Candle holder picks or spikes | 4 | Keeps candles steady, even if you move the wreath. |
| Sisal fiber | 1 package | Ivory or cream suits coffee beans and red accents best. |
| Satin ribbon | 3 to 4 yards | Red or burgundy; I chose a narrow ribbon. |
| Optional decor | As desired | Pinecones, red berry picks, mini ornaments, cinnamon sticks, felt stars or hearts. |
Tools you’ll need
- Scissors
- Hot glue gun with a few glue sticks
- Tweezers (optional, but handy for placing beans precisely)
- Newspaper or cardboard to protect your table
- A vacuum or lint roller nearby, because sisal sheds
Where to shop
Most supplies are available at craft stores, but ordering online is easy too. Here are some searches to get you started:
- Straw wreath forms for a natural base
- Ivory sisal fiber for crafts
- Red pillar candles or red advent taper candles
- Advent wreath candle holder picks
- Narrow red satin ribbon
- Dark roast whole bean coffee (or raid your pantry)
- Frosted red berry picks and mini pinecones
How to Make a Coffee Bean Advent Wreath, Step by Step
These instructions are friendly for complete beginners. The sisal gives the wreath a warm, natural base, the red accents bring the holiday spirit, and the coffee beans are the unique finishing touch. Plan on 1 to 2 hours, depending on how precise you are and how many decorations you add.
Step 1: Prepare your workspace
Cover your table with newspaper or cardboard, especially under the glue gun, which can drip. Plug in and heat the glue gun, and lay out your supplies. Keep only what you’re currently using in front of you; it keeps the process calm and prevents spills of loose coffee beans.
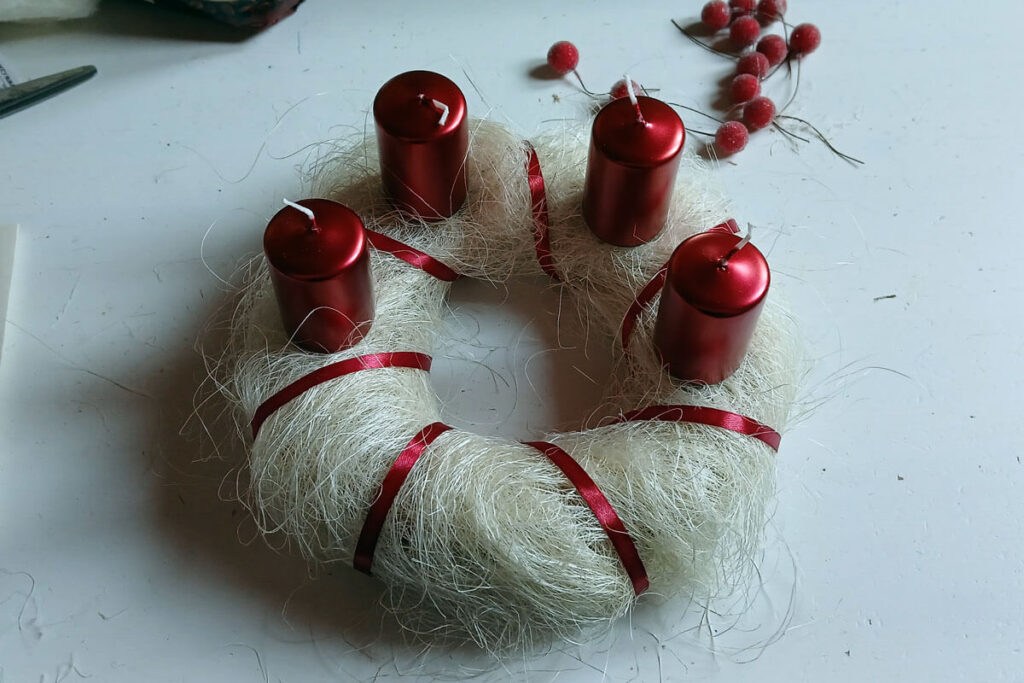
Step 2: Wrap the wreath base with sisal
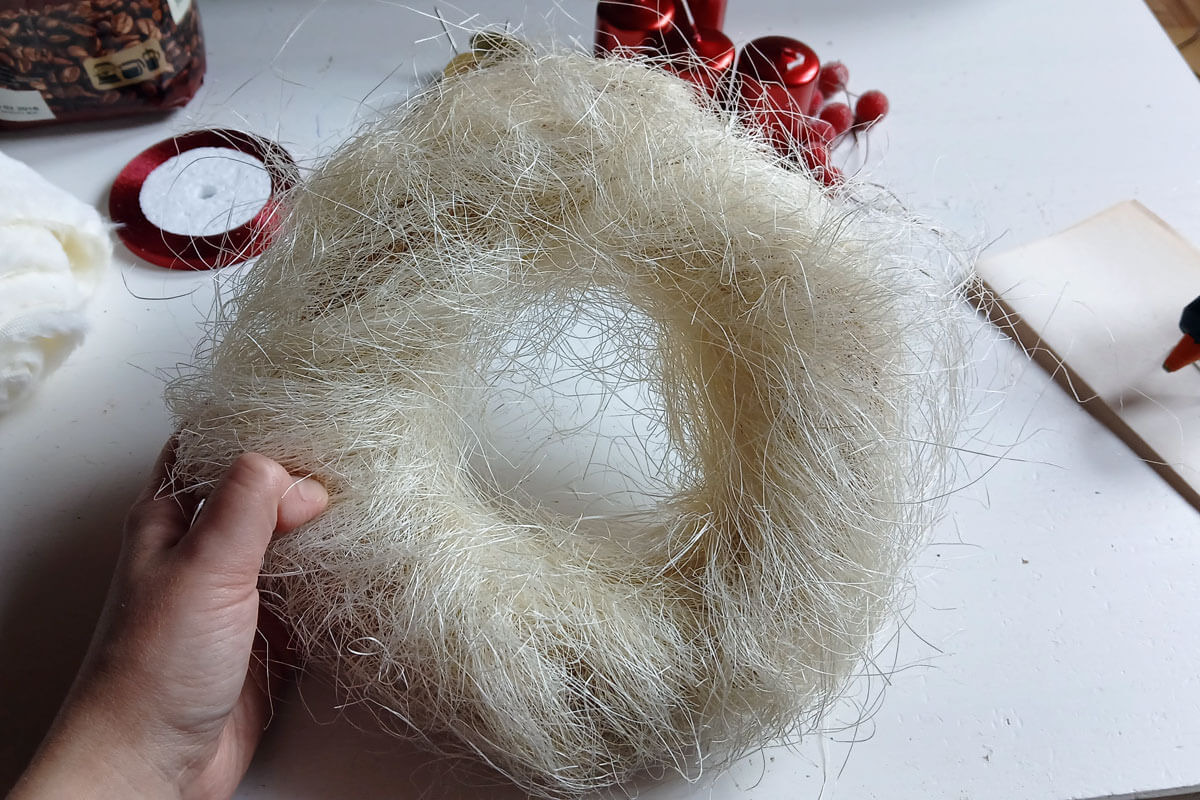
Sisal is the ideal base because its natural texture looks warm and blends with brown coffee beans. Ivory or cream sisal contrasts best with beans and red ribbon.
- Open the sisal package and gently pull the fibers apart so they look light and airy.
- Work in a circle, wrapping the fibers around the wreath form.
- Make sure no part of the base shows through.
- Cover the inner ring and outer edge as well. This is what makes the wreath look finished.
- Glue is optional. I skipped it, since the ribbon in a later step holds everything in place.
- If a spot looks too thick or patchy, adjust it. Sisal is forgiving.
Tip: Sisal sheds, so smooth the surface with slightly damp hands at the end for a neater look. And yes, keep the vacuum handy for stray fibers.
Step 3: Secure the candles
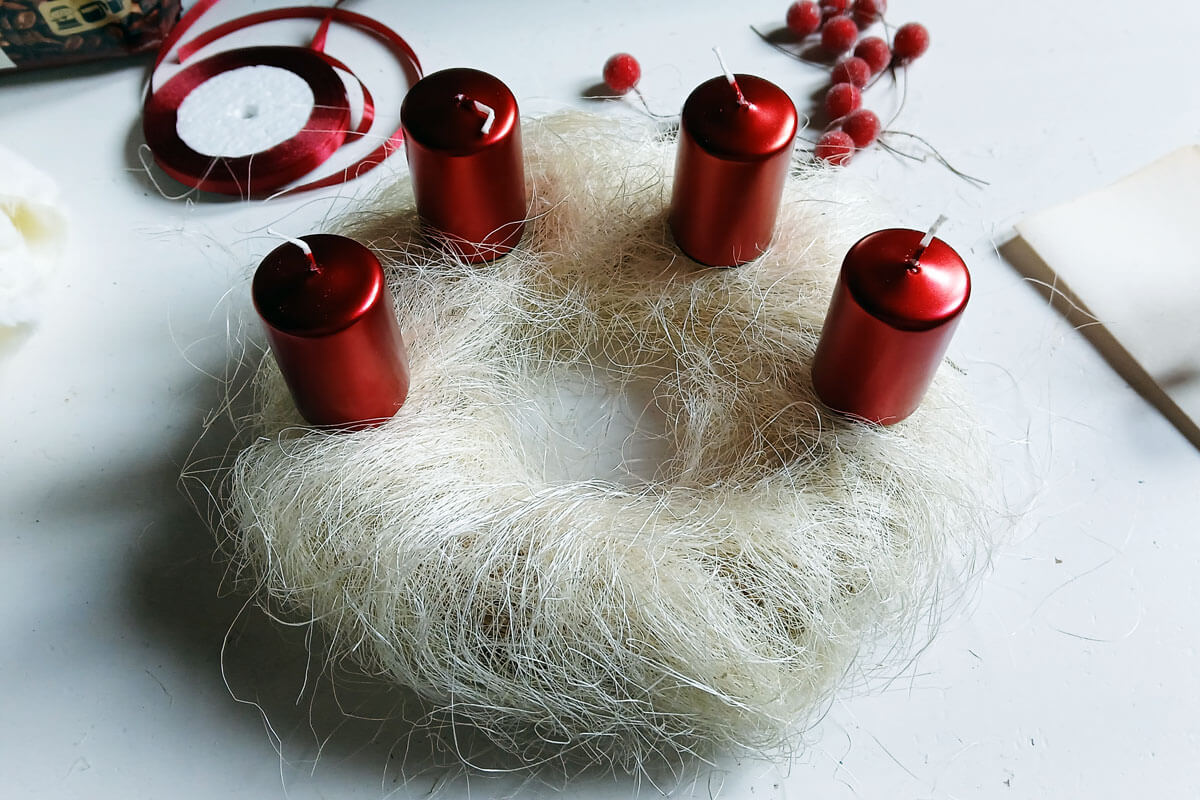
The four candles represent the four Sundays of Advent, and they define the structure of your advent wreath, so take your time. There are two ways to attach them:
- Hot glue: Do a dry run first to be sure the candles sit evenly. Use a generous layer of glue and hold each candle in place for several seconds until it sets.
- Candle holder picks (my preference): Push the pick’s shorter end into the candle, then press the other end through the sisal and into the wreath base. This keeps candles steady even when you move the wreath, and it lets you swap candles easily next year.
Before inserting anything, mark the candle positions lightly with a pencil. Evenly spaced candles look balanced; a cluster on one side can look deliberate if you keep at least 2 to 3 inches between them.
Step 4: Decorate with red or burgundy accents
This is the most fun part, where the wreath gets its festive personality.
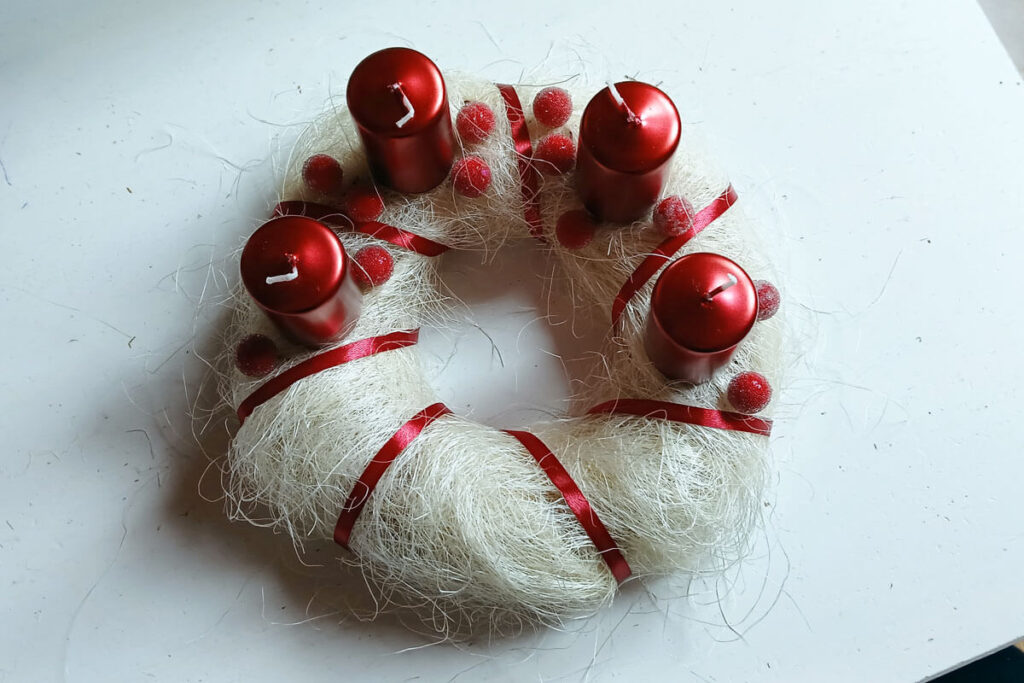
- Ribbon: Tie a big bow at the bottom, wind the ribbon loosely around the wreath in waves, or glue small loops here and there. In my wreath, narrow red ribbon runs diagonally across the base, which also divides the bean-covered and sisal-only sections.
- Berries and ornaments: Arrange them asymmetrically in small clusters. This looks far more elegant than spacing them evenly.
- Natural touches: Mix in mini pinecones or cinnamon sticks for a rustic look.
- Attaching: Push picks into the straw base or use a small dab of hot glue. Less glue is better; a little goes a long way.
Color tip: Burgundy creates a deep, elegant, warm mood. Bright red delivers the classic holiday feel.
Step 5: Cover one section with coffee beans
Now for the signature touch. Rather than covering the entire wreath, coffee beans appear on just one section, about one third of the ring. The result looks modern, clean, and eye-catching.
- Leave about one third of the wreath undecorated for the beans.
- Apply a small dot of hot glue to each bean, one at a time, and press it onto the sisal. (Alternatively, apply a short line of glue and place several beans along it.)
- Work in either a random or row pattern. A loose, scattered layout is more forgiving because you can stop at any point and it never looks unfinished. With rows, you need to keep the same density to the end.
- For extra texture, tuck tiny red berries or mini pinecones between the beans.
Tip for extra fragrance: Add a whole vanilla bean or cinnamon stick next to the coffee beans for a stronger aroma.
Why only one third?
- The wreath doesn’t become too heavy or dark, and the light-dark contrast stays beautiful.
- It gives a modern, Scandinavian look.
- The design looks balanced and uncluttered.

Which Coffee Beans Are Best for an Advent Wreath?
- Dark roast beans: The darkest, glossiest beans show off red decor best.
- Old or cheap coffee: You’re not drinking it, so there’s no need for premium beans. A cheap bag is fine.
- Large beans: They are easier to arrange and have a more uniform look.
Prefer a lighter, cappuccino-like tone? Mix medium and dark roasts for a two-tone effect. Avoid flavored or oily beans, as the oils can weaken the glue bond over time.
Advent Wreath Candle Safety (Please Read)
A DIY advent wreath with real candles needs real care. Sisal, straw, ribbon, and dried natural materials can ignite. Follow these rules:
- Never leave burning candles unattended, and extinguish them before you leave the room or go to bed.
- Trim or tuck back sisal fibers around each candle base so none stand close to the wick.
- Keep ribbon, beans, and decorations at least 2 to 3 inches from the flame. Heat can also soften hot glue, so a warm candle base can loosen beans.
- Use a heat-resistant tray or candle plate under the wreath to catch dripping wax, and keep it on a stable, non-flammable surface.
- Burn short sessions, such as an hour or two at dinner, and stay in the room.
- Keep the wreath away from curtains, drafts, children, and pets.
- If you’re nervous, use flameless LED pillar candles. They look great, and they’re far safer for homes with kids or pets.
How to Care for and Store Your Coffee Advent Wreath
- Display it at room temperature, away from humid areas such as steamy kitchens.
- Keep it out of direct sunlight to prevent the ribbon and decorations from fading.
- Dust it gently with a soft brush or a hair dryer on a cool setting.
Storing it after the holidays:
- Remove the candles and wipe off any wax.
- Wrap the wreath in plastic wrap or place it in a box.
- Add a silica gel packet to absorb moisture.
- Store it in a cool, dry place, such as a closet shelf.
Next year, add new candles and a couple of fresh decorations, and your advent wreath will look as good as new.
Three Advent Wreath Design Variations
Want to go beyond classic red? Here are three ideas that all pair well with coffee beans.
1. Minimalist black and gold
- Black candles
- Gold ornaments
- Black ribbon
- Coffee beans
- Optional: a light touch of gold glitter spray (use sparingly and away from the flame)
Sleek, modern, and sophisticated.
2. Natural Scandinavian style
- White or cream candles
- Burlap or jute bow (jute ribbon works well)
- Natural pinecones and white berries
- Cinnamon sticks and dried orange slices
- Coffee beans
The warm brown of the beans is a perfect match for this soft, earthy palette.
3. Glam pink or burgundy
- Pink or burgundy candles
- Sparkly ornaments
- Satin ribbon
- Rose gold accents
Feminine, bold, and guaranteed to get compliments.
Common Mistakes to Avoid
1. Using too much glue
Excess glue pools between the beans and leaves pale, shiny spots. Solution: use small dots and work quickly.
2. Candles that aren’t level
Crooked candles make the whole wreath look unstable. Solution: mark positions with a pencil first and do a dry run.
3. Beans that fall off
This happens when there isn’t enough glue under each bean. Solution: use a slightly larger dot, press for a couple of seconds, or lay a short, even line of glue.
4. Overcrowding
Too many unrelated decorations compete with each other. Solution: let the brown-and-red contrast shine. Sometimes less really is more.
5. Candles too close together
Candles crowded together make the wreath look lopsided and create a fire risk. Solution: it’s fine to cluster them on one side if you like the look, but keep at least 2 to 3 inches between each candle.
6. Forgetting about sisal shed
Solution: work over newspaper, smooth the finished wreath with damp hands, and keep a vacuum or lint roller nearby.
Frequently Asked Questions
How many candles does an advent wreath have?
Four, one for each Sunday of Advent. Some traditional wreaths add a white center candle for Christmas Day. Traditional colors are three purple candles and one pink, but red, white, and other colors are popular for home decor.
When should I make my advent wreath?
Aim to finish it by the Saturday before the first Sunday of Advent. In 2026, that means by November 28. You can start earlier since this wreath doesn’t dry out.
How long does a DIY coffee bean advent wreath last?
With good storage, it can last several years. The beans stay in good condition if kept dry and away from sunlight.
Do coffee beans on a wreath attract bugs?
Dry, roasted beans rarely do, but storing the wreath in a sealed box in a dry place is the best precaution.
Can I use ground coffee instead of whole beans?
Whole beans give the best texture and visual impact. Ground coffee is messy and won’t stay attached.
Is it safe to burn candles on a wreath with coffee beans?
Yes, with precautions: keep beans and decorations well away from the flame, never leave candles unattended, and consider LED candles for extra peace of mind.
Can I make this wreath without hot glue?
You can use strong craft glue or double-sided craft tape, but hot glue sets fastest and holds beans best.
Final Thoughts
A coffee bean advent wreath is more than decoration. It’s fragrant, eye-catching, long-lasting, and a joy to make. For coffee lovers, it just might become your favorite DIY advent wreath project. It looks beautiful on a dining table, a living room shelf, or a kitchen counter, and you can customize it in red, gold, white, or natural styles.
If you make one, share it on Pinterest, Instagram, or Facebook. People will definitely ask where you got it. And most of all, enjoy this cozy, creative season with a good cup of coffee in hand.
Happy crafting, and happy Advent!