
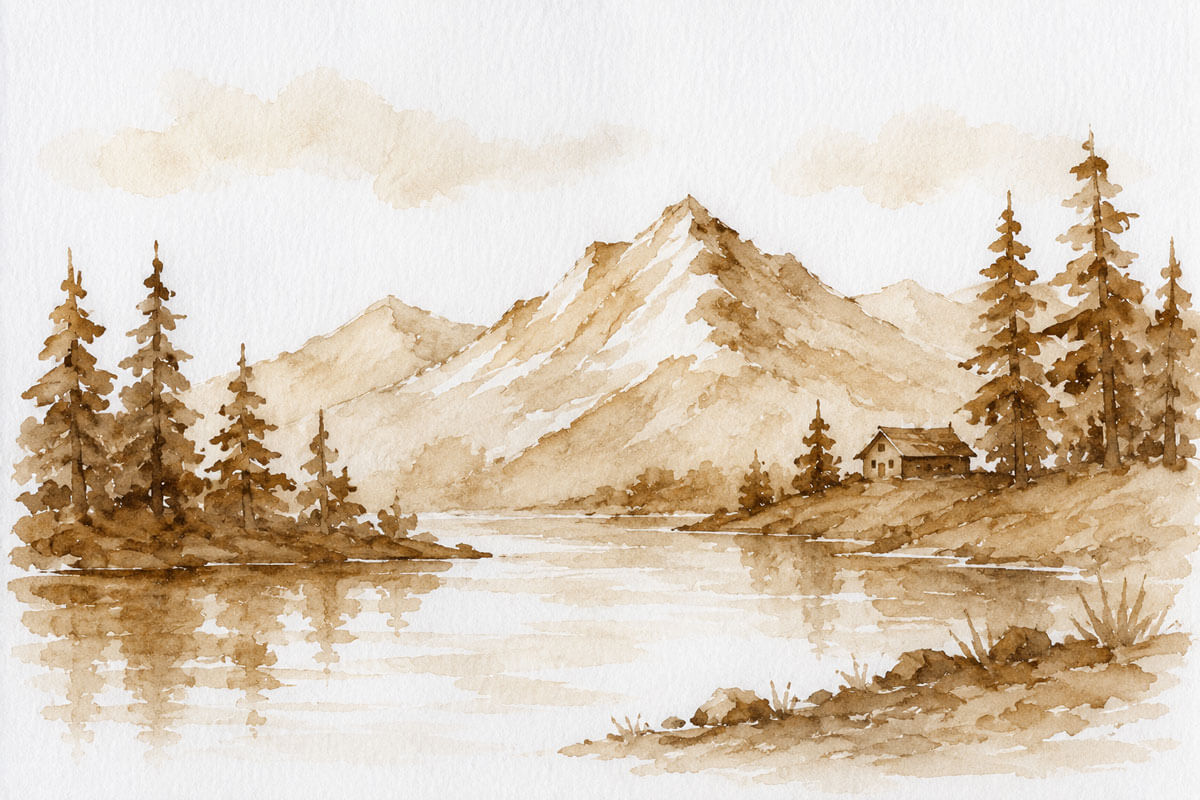
How to Paint with Coffee: A Beginner’s Step-by-Step Guide
There’s a good chance you’ve thrown away more painting supplies than you’d like to admit — half-dried watercolor tubes, brushes stiff with old paint, expensive paper that never quite got used. Coffee painting sidesteps all of that. All you really need is a jar of instant coffee, some water, a brush, and paper you probably already have in a drawer. The result is a warm, sepia-toned artwork that looks like it belongs in an antique shop, and the whole process costs next to nothing.
Coffee as an artistic medium isn’t a TikTok trend that appeared out of nowhere. Artists have been using coffee, tea, and other kitchen staples to create tonal drawings for centuries, and the technique has deep roots in parts of Asia and South America, where coffee carries as much cultural weight as it does caffeine. What’s changed is accessibility: with a search bar and a pantry, anyone can try it today. This guide walks you through everything a beginner needs — materials, technique, troubleshooting, and a few tricks that separate a muddy mess from a genuinely striking piece.
What Exactly Is Coffee Painting?
Coffee painting is essentially monochrome watercolor painting using brewed or instant coffee instead of pigment. The coffee acts as a natural, water-soluble stain: diluted, it produces pale beige washes; concentrated, it deepens into rich espresso-brown and near-black tones. Because you’re working with a single “color family,” the medium forces you to think in terms of value — light, mid-tone, and shadow rather than hue, which makes it a surprisingly good exercise for artists of any skill level.
The aesthetic result sits somewhere between an old sepia photograph and a watercolor sketch. It’s especially well suited to landscapes, portraits, botanical studies, architectural drawings, and anything with a nostalgic or vintage feel. Because coffee dries with soft, organic edges and occasional unpredictable blooms, it also lends itself beautifully to abstract work.
Why Try Painting with Coffee?
Before getting into materials, it’s worth understanding what makes this medium worth your time:
- It’s essentially free. No trip to the art store required — just coffee you already have.
- It’s non-toxic. There are no solvents or harsh chemicals, so it’s safe for kids, safe for shared kitchen tables, and safe for anyone sensitive to the fumes of oil or acrylic paint.
- It’s forgiving. Because coffee is transparent and layers gradually, mistakes are easy to soften or build over rather than being permanent from the first stroke.
- It’s meditative. The slow, layer-by-layer process encourages patience, and many hobbyists describe it as genuinely relaxing—closer to a mindfulness exercise than a technical challenge.
- It smells amazing. A finished coffee painting retains a faint coffee aroma for a surprisingly long time, which is a small but delightful bonus no other medium offers.
- It’s eco-friendly. You’re repurposing something that would otherwise go down the drain, and there’s no plastic packaging or chemical waste involved.
Materials You’ll Need

One of the best things about this hobby is how short the shopping list is.
Coffee
- Instant coffee (any brand) for rich, controllable dark tones
- Brewed drip coffee or espresso for lighter, more transparent washes
- Optional: leftover coffee from your morning pot works perfectly well—no need to brew a fresh batch just for painting
Paper
- Thick watercolor paper (140 lb / 300 gsm or heavier) is ideal, since it resists warping when wet
- A heavier-weight sketch pad also works in a pinch
- Avoid thin printer paper—it buckles, tears, and doesn’t hold layered washes well
Brushes
- A medium-to-large soft round or flat brush for backgrounds and broad washes
- A small detail brush (size 000–2) for fine lines, textures, and highlights
- Natural or synthetic watercolor brushes both work fine; you don’t need anything specialized
Extras that expand your options
- A sponge, cloth, cotton swab, or even an old toothbrush for stippling and texture effects
- Painter’s tape, to secure the paper to a board and minimize warping as it dries
- Small containers or a mixing palette for different coffee concentrations
- A fine black pen or waterproof fineliner for adding crisp outlines after the paint has dried
- A fixative spray, to protect the finished piece long-term
That’s it. No solvents, no odor-heavy mediums, no fifty-dollar palette of specialty pigments.
Preparing Your “Coffee Paint”
This is where coffee painting differs most from working with a tube of watercolor, so it’s worth getting right.
- Make your dark base. Mix instant coffee granules with a small amount of hot water — less water than you’d use for drinking. You’re aiming for a syrupy, concentrated mixture that’s noticeably darker and thicker than your morning cup.
- Create a value range. Pour a bit of that dark mixture into two or three separate containers, then dilute each with different amounts of water. This gives you a light, medium, and dark wash to work with—essentially your “palette” for the painting.
- Consider your roast. The type of coffee you use subtly changes your results. A dark roast produces deep, almost chocolatey blacks, while a lighter roast leans toward warmer, caramel-toned browns. If you have both on hand, experiment with each to see which suits your subject.
- Try brewed coffee for transparency. Regular drip coffee (unlike the instant-and-water mix) tends to be thinner and more transparent, which is useful for soft background washes or the palest areas of a painting.
- Mix in other kitchen pigments for variety. Tea (black or green) adds cooler, grayer undertones, while a small amount of cocoa powder mixed with water introduces a reddish-brown warmth. Combining coffee with these gives you a surprisingly wide tonal range without ever leaving the kitchen.
A tip worth remembering: coffee dries darker than it appears while wet. If a wash looks “about right” on wet paper, it will likely deepen a shade once fully dry—so it’s safer to err on the lighter side and build up darkness in layers than to overdo it early.
Step-by-Step: How to Paint with Coffee

Step 1: Secure Your Paper
Tape down the edges of your watercolor paper to a board or flat surface using painter’s tape. This keeps the paper from curling as the moisture from the coffee evaporates, especially important if you’re working on anything thinner than heavyweight watercolor stock.
Step 2: Sketch Your Composition
Lightly sketch your subject in pencil. Keep the lines faint—dark pencil marks can show through transparent coffee washes. If you’re going for a loose, abstract piece, you can skip this step entirely and let the coffee guide the composition organically.
Step 3: Block In the Lightest Values First
Using your most diluted coffee mixture and a larger soft brush, begin painting the lightest areas of your piece—skies, distant backgrounds, or the general base tone of your subject. Treat this exactly as you would a watercolor underpainting: broad, loose strokes rather than tight detail.
Step 4: Layer Toward the Mid-Tones
Once the first layer is dry (or even while it’s still slightly damp, if you want soft blending), switch to your medium-strength mixture and begin adding shape and form. This is where your subject starts to take on dimension. Because coffee is transparent, each new layer interacts with what’s underneath it, so you’ll naturally get richer, more complex color as you go.
Step 5: Add Shadows and Deep Details
Switch to your darkest, most concentrated mixture for shadows, deep creases, and focal details—the areas that need the most contrast and visual weight. Use your smaller detail brush here. This is also where sponges, cotton swabs, or an old toothbrush can add texture: dabbing, stippling, or flicking coffee onto the paper creates organic, weathered effects that a brush alone can’t replicate.
Step 6: Let the Coffee Do Some of the Work
One of the most charming aspects of this medium is how much happens on its own. As the coffee dries, it often creates soft blooms, granulation, and subtle tide marks—especially in wetter areas. Rather than fighting these effects, let some of them happen naturally, particularly if you’re working on an abstract or textural piece. Some of the best moments in a coffee painting are the ones you didn’t fully control.
Step 7: Let It Dry Completely
Allow the painting to air dry fully before touching it further. Depending on humidity and how much liquid you used, this can take anywhere from 20 minutes to a few hours. Avoid using a hairdryer on high heat, which can cause uneven drying and unwanted texture.
Step 8: Add Fine Details and Outlines
Once completely dry, this is the moment to sharpen things up. For subjects with a lot of clean, structured lines—buildings, geometric patterns, or anything architectural—going over the main contour lines with a fine waterproof black pen adds definition and makes the thinner coffee lines read more clearly. This step is optional for looser or more painterly subjects, but it’s a great way to add polish to anything with strong linework.
Step 9: Evaluate and Adjust
Step back and look at your piece from a distance. Are there areas that feel flat or need more contrast? You can always go back in with another diluted layer to deepen shadows or unify tones. Coffee’s forgiving, buildable nature means there’s rarely a “point of no return.”
Brush Techniques and Texture Tips
- Large soft brushes are best for skies, water, and broad background washes where you want smooth, even coverage.
- Small detail brushes handle fine linework—hair, leaves, architectural edges, or delicate shading.
- Sponges create soft, cloud-like textures ideal for foliage, clouds, or aged/distressed backgrounds.
- Toothbrushes (flicked with a thumb over the bristles) produce a fine speckled spray, useful for texture like stone, sand, or starry skies.
- Rags or paper towels can lift wet coffee off the page to create highlights or soften an area that’s gone too dark.
- Layering is everything. Because coffee is naturally translucent, repeated passes over the same area—letting each layer dry before adding the next—is the single best way to build depth, contrast, and richness. A painting made from just one layer will almost always look flat compared to one built from three or four.
Common Mistakes and How to Avoid Them
Using paper that’s too thin. This is the most common beginner mistake. Thin paper buckles, tears when wet, and struggles to hold multiple layers. Invest in real watercolor paper if you plan to keep practicing.
Not accounting for drying darkness. Coffee dries noticeably darker than it looks when wet. If you’re unsure, always test your mixture on a scrap piece of the same paper first.
Adding water too aggressively for “erasing.” Because coffee is a stain rather than an opaque pigment, it’s much harder to lighten a dark area than to darken a light one. Work light to dark, not the reverse.
Skipping the tape-down step. Untaped paper on wetter paintings can warp significantly, which affects both the painting process and how the finished piece displays.
Rushing between layers. Painting wet-on-wet everywhere can lead to muddy, overly blended results. Letting layers dry between passes gives you much more control over crisp edges and contrast.

Caring for and Displaying Your Finished Coffee Painting
Coffee paintings are just as durable as traditional watercolors when cared for properly, but a few extra precautions help preserve them:
- Keep it out of direct sunlight and humidity. Like most water-based media, coffee pigment can fade or reactivate with moisture over time.
- Use a fixative spray designed for works on paper to help lock in the tones and reduce fading.
- Frame behind glass if you want to display the piece long-term—this protects it from dust, humidity, and accidental smudging.
- Digitize your work. Photographing or scanning the finished piece creates a permanent backup, so even if the original shifts in tone over years, you’ll always have a true-to-original digital copy.
- Consider it as a gift. A framed coffee painting, especially one that still carries a faint coffee scent, makes a genuinely memorable and personal handmade present.
Frequently Asked Questions
Does coffee painting fade over time?
Like most natural, water-based pigments, coffee can fade gradually with prolonged sun exposure. Using a fixative spray and keeping the piece out of direct light significantly slows this process.
Can I use flavored or decaf coffee?
Yes—the caffeine content has no effect on color or technique. Flavored coffees may leave a slightly different scent on the dried painting, but the visual result is essentially the same.
What’s the difference between using instant coffee and brewed coffee?
Instant coffee mixed with a small amount of water gives you a thicker, more pigment-rich mixture that’s easier to control for dark tones. Brewed coffee is naturally more diluted and transparent, making it better suited for light washes and soft backgrounds.
Can I mix coffee with real watercolor paint?
Absolutely. Many artists use coffee as a base layer or background wash and then add small touches of traditional watercolor or ink on top for pops of color or extra-crisp detail.
Is coffee painting suitable for kids?
Yes. Since there are no chemicals or toxic fumes involved, it’s one of the safest painting mediums for children, and the simple materials make it an easy, low-mess activity.
Final Thoughts
Coffee painting proves that you don’t need an expensive art supply haul to create something genuinely beautiful. With little more than instant coffee, water, a brush, and a bit of patience, you can produce warm, atmospheric artwork that looks intentional, aged, and full of character. The technique rewards experimentation—every roast, every dilution, and every brush choice shifts the outcome slightly, so no two coffee paintings ever turn out quite the same.
Start simple. Brew a strong cup, grab a scrap of watercolor paper, and just see what a single wash looks like once it dries. From there, the process tends to take on a life of its own—and before long, you may find yourself eyeing that half-empty coffee jar as art supply rather than breakfast.