
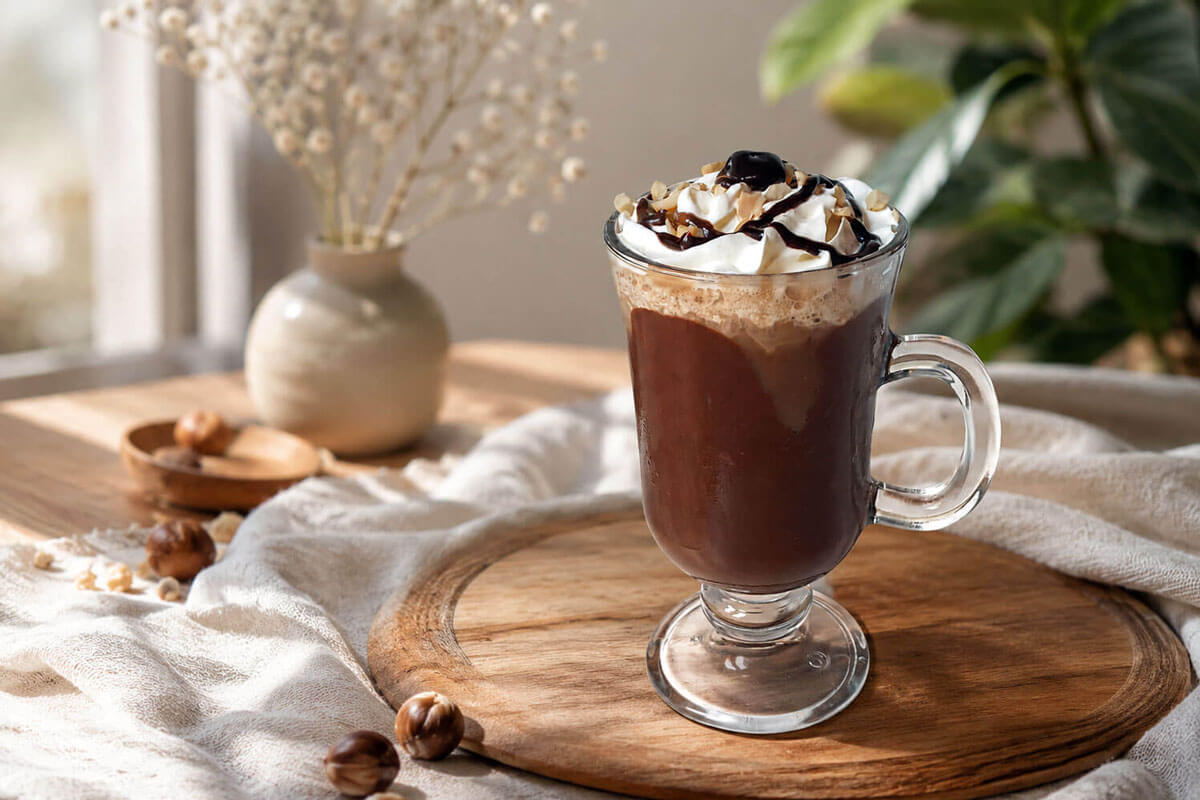
Nutella Iced Coffee: How to Make the Ultimate Homemade Summer Drink
If you haven’t tried a Nutella iced coffee yet, you’re seriously missing out. This homemade summer drink is everything you want on a hot afternoon: rich, chocolatey, creamy, and — most importantly — ridiculously easy to make. I stumbled onto this combination almost by accident one summer morning when I had leftover Nutella in the jar and a freshly brewed espresso in my hand. What followed was one of the best decisions I’ve ever made in my kitchen.
In this guide, I’m going to walk you through exactly how to make a homemade Nutella iced coffee from scratch, share tips to nail the layers, and explain how to customize it to your taste. Whether you’re a seasoned home barista or someone who just loves a good cold drink, this recipe is for you.
Why Nutella and Coffee Are a Match Made in Heaven
Before we get into the how-to, let’s talk about the why. Nutella is a hazelnut-chocolate spread with a flavor profile that complements coffee in a surprisingly elegant way. The bitterness of a strong espresso cuts right through the sweetness of the Nutella, while the hazelnut notes add a warm, nutty depth that you just can’t get from chocolate syrup alone.
Combined with cold milk, ice, and a cloud of whipped cream on top, a homemade Nutella iced coffee becomes more than just a beverage — it’s an experience. It’s the kind of drink you’d pay $8 for at a trendy café, but you can make it at home in under five minutes for a fraction of the cost.
What You’ll Need
Here’s what you need to make one serving of homemade Nutella iced coffee:
- 1 shot of strong espresso (or a very concentrated moka pot coffee)
- A handful of ice cubes
- About 200 ml (roughly ¾ cup) of milk — whole milk works best for creaminess, but any milk works
- 2 teaspoons of Nutella
- Whipped cream, for topping
- A few whole hazelnuts, for garnish
- Chocolate syrup or cocoa powder (optional, but highly recommended)
That’s it. Nothing exotic, nothing hard to find. Everything you probably already have at home.
How to Make Homemade Nutella Iced Coffee — Step by Step
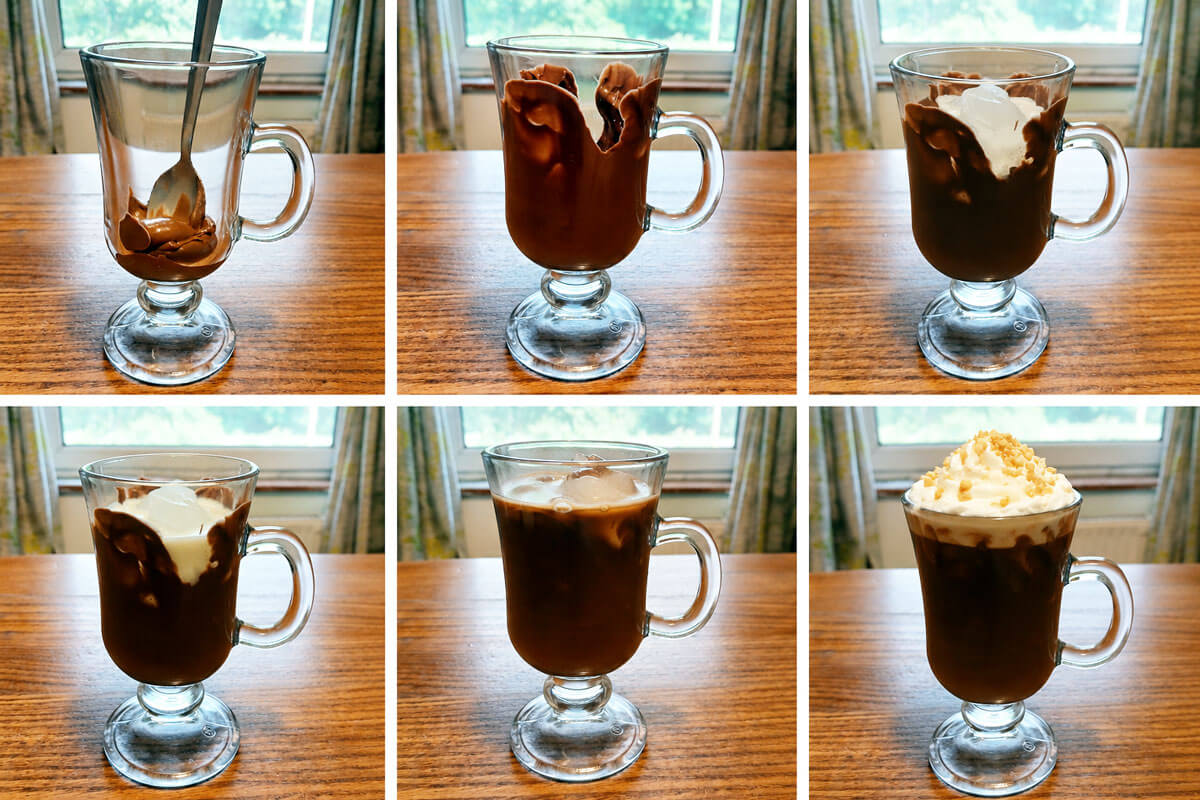
Before you dive in: this recipe is a little different from the Nutella iced coffee recipes you’ll find on YouTube and social media. No handheld milk frother here — and that’s on purpose. This one is for people who want to taste the Nutella, the milk, and the coffee as distinct flavors in every sip, and who love scooping that last bit of Nutella straight from the glass.
Step 1: Brew a Strong Espresso
Start by pulling a shot of espresso. I use a capsule coffee machine, but a moka pot works just as well — just make sure the coffee is strong and concentrated. This is important: a weak brew will get lost under all that Nutella and milk, and you’ll end up with a milkshake instead of a coffee drink. Brew it first and let it cool slightly while you prep the glass.
Step 2: Set Up Your Glass with Nutella
Take a tall glass — ideally a clear one so you can see all the beautiful layers — and add your 2 teaspoons of Nutella. Now here’s where the visual magic happens: using the back of a spoon, drag the Nutella across the inside walls of the glass, creating swirls and streaks. This not only looks stunning but also distributes the Nutella so it gradually blends into the drink as you sip.
You have two options here, and both are valid:
Option A — Nutella on the walls: Smear the Nutella around the inside of the glass. In this case, the layering matters less, because the Nutella will coat everything as you pour. Go ahead and add the ice and milk without worrying too much about technique.
Option B — Nutella on the bottom: Drop the Nutella at the bottom of the glass without spreading it on the walls. In this case, you’ll want to be careful with your pouring to create dramatic, Instagram-worthy layers (more on that below).
Step 3: Add the Ice
Fill the glass about halfway with ice cubes. Don’t skip the ice — this is a key part of what makes it a proper summer drink. The ice chills the espresso quickly and keeps everything cold and refreshing.
Step 4: Pour in the Milk
Pour in your milk slowly, filling the glass almost to the top but leaving room for the espresso. I usually leave about 2–3 centimeters of space at the top.
Step 5: Add the Espresso — Here’s Where the Layers Happen
Now comes the most visually satisfying part of making homemade Nutella iced coffee. If you went with Option B (Nutella on the bottom), pour the espresso very slowly over the back of a spoon held just above the milk. This technique helps the dark espresso float on top of the lighter milk, creating gorgeous contrasting layers. It’ll look like a professional barista made it.
If you went with Option A, just pour the espresso in — no need to fuss.
Either way, the drink will taste equally delicious. The layered look is purely for the joy of it.
Step 6: Top It with Whipped Cream
Pile on a generous cloud of whipped cream. Don’t be shy here. The whipped cream isn’t just decoration — it gradually melts into the drink as you sip, adding a silky richness that ties the whole thing together.
Step 7: Finish with Crushed Hazelnuts and Chocolate Drizzle
This is the step that takes your Nutella iced coffee from “homemade” to “wow, did you make this?” Place a few whole hazelnuts on your cutting board and crush them using the back of a spoon. Sprinkle the pieces over the whipped cream. Then, if you want to go the extra mile, drizzle some chocolate syrup on top or dust lightly with cocoa powder.
The result is a drink that looks stunning, smells incredible, and tastes even better.
The Blender Shortcut (When You Want It Fast and Easy)
One common issue people run into with Nutella iced coffee is that Nutella doesn’t dissolve easily in cold milk. It tends to clump or stick in the glass rather than blending smoothly. If that bothers you — and honestly, sometimes it does — there’s a dead-simple fix.
Combine the espresso, milk, and Nutella directly in a blender and blend for 20–30 seconds until smooth and frothy. Then pour the blended mixture over a glass full of ice and add your toppings. You’ll get a more uniform, shake-like texture instead of distinct layers, but the flavor will be just as rich and delicious.
This blender version is especially great if you’re making it for a few people at once. Just scale up the ingredients and blend in batches.
Tips for the Best Homemade Nutella Iced Coffee
After making this drink more times than I can count, here are the practical tips that actually make a difference:
Use freshly brewed espresso
Don’t use day-old coffee. Fresh espresso has the bright, bold flavor you need to stand up to the sweetness of the Nutella. Cold brew concentrate also works if that’s what you have on hand.
Chill your glass
Pop your glass in the freezer for 5–10 minutes before making your drink. It keeps things colder longer, especially on hot summer days.
Warm the Nutella slightly
If you’re using the spread-on-the-walls method and your Nutella is coming straight from the fridge, it’ll be stiff and hard to work with. Give the jar 10–15 seconds in the microwave and it’ll become much more spreadable.
Don’t use too much Nutella
Two teaspoons is the sweet spot. More than that and the drink becomes overpoweringly sweet and loses its coffee character. Less and you lose the hazelnut flavor. Trust the amount.
Experiment with milk
Whole milk gives the richest, creamiest result. Oat milk is a fantastic dairy-free alternative and has a naturally sweet, slightly nutty flavor that pairs beautifully with Nutella. Almond milk works too but is thinner.
Crush hazelnuts fresh
Pre-crushed hazelnuts lose their crunch quickly. Crush them right before serving for the best texture contrast against the soft whipped cream.
Make It Your Own: Variations Worth Trying
Once you’ve nailed the base recipe, it’s fun to experiment. Here are a few variations I’ve tried and loved:
Iced Nutella Latte: Use more milk and less ice for a creamier, more latte-like drink. Great for mornings when you want something substantial.
Nutella Mocha Iced Coffee: Add a teaspoon of good-quality cocoa powder directly to the Nutella before spreading it in the glass. The deeper chocolate flavor is incredible.
Frozen Nutella Coffee: Blend everything with extra ice to make a thick, slushy drink. It’s essentially a coffee Frosty, and it’s every bit as good as it sounds.
Spiced Version: Add a pinch of cinnamon or cardamom to the espresso before pouring. The warm spice cuts through the sweetness in a really interesting way.
When to Serve Nutella Iced Coffee
This drink is perfect as:
- A weekend morning treat instead of your usual coffee routine
- An afternoon pick-me-up when the heat makes hot coffee unbearable
- A dessert alternative after dinner (it genuinely tastes like a dessert)
- Something to impress guests at brunch without spending hours in the kitchen
It’s also a great conversation starter. Every time I serve this to someone for the first time, their reaction is the same: “Wait, this has Nutella in it?” Followed immediately by a very long sip.
Final Thoughts
Homemade Nutella iced coffee is one of those rare recipes that looks impressive, tastes indulgent, and takes almost no effort to make. It’s become my go-to summer drink, and I think once you try it, it’ll become yours too. Whether you go for the gorgeous layered version or the quick blender shortcut, you really can’t go wrong.
The ingredients are simple, the technique is forgiving, and the result is a drink that honestly rivals anything from a specialty coffee shop. Give it a try this weekend — your future self, sweating through a hot afternoon, will thank you.
Have you tried making Nutella iced coffee at home? Experiment with the variations above and find your perfect version. Once you go Nutella, you won’t go back.