
How to Make Coconut Milk at Home: A Simple, Foolproof Guide
Whether you’re cooking a Thai curry, blending a smoothie, or just looking to cut down on processed ingredients, knowing how to make coconut milk at home is a skill worth having. Store-bought versions often contain stabilizers, emulsifiers, and unnecessary additives — but homemade coconut milk is pure, creamy, and surprisingly easy to prepare.
I usually use homemade coconut milk in my coffee drinks when I have a little extra time and want to treat myself to a special latte. Its rich, creamy texture adds a delicious tropical twist that makes my coffee feel like a café-style indulgence at home.
This guide walks you through the entire process, from ingredients to storage, so you can enjoy fresh coconut milk any time you need it.
Why Make Coconut Milk at Home?
There’s a growing movement toward whole-food cooking, and homemade coconut milk fits right in. Here’s why it’s worth the effort:
- No additives or preservatives. Commercial coconut milk often contains guar gum, carrageenan, or sulfites to extend shelf life. When you make it yourself, what you get is exactly what you put in: coconut and water.
- Better flavor. Fresh coconut milk has a richer, more aromatic taste than its canned counterpart. Once you try it, it’s hard to go back.
- Cost-effective. A small bag of shredded coconut goes a long way. Making coconut milk from scratch is often cheaper per serving than buying cans.
- Zero waste potential. The leftover coconut pulp — what remains after straining — is completely usable. More on that later.
DXN Ganoderma Coffee
The coffee I’ve been enjoying for years for cozy mornings and smoother energy.
Coconut Milk Ingredients
This recipe yields approximately half a liter (16.9 fl oz, about 2 cups) of coconut milk.
- 100 g (about 1 cup) shredded coconut (unsweetened desiccated coconut works perfectly)
- 700 ml (23.7 fl oz, about 3 cups) water
That’s it. Two ingredients, no shortcuts needed.
Equipment You’ll Need
- Medium saucepan
- Blender (a high-powered blender gives the best results)
- Fine mesh strainer, cheesecloth, or nut milk bag
- Large bowl or pitcher
- Airtight glass jar for storage
Step-by-Step Instructions for Homemade Coconut Milk
Prep time: 5 minutes | Cook time: 8 minutes | Cooling time: 1 hour | Total time: ~75 minutes
Step 1: Simmer the Coconut and Water
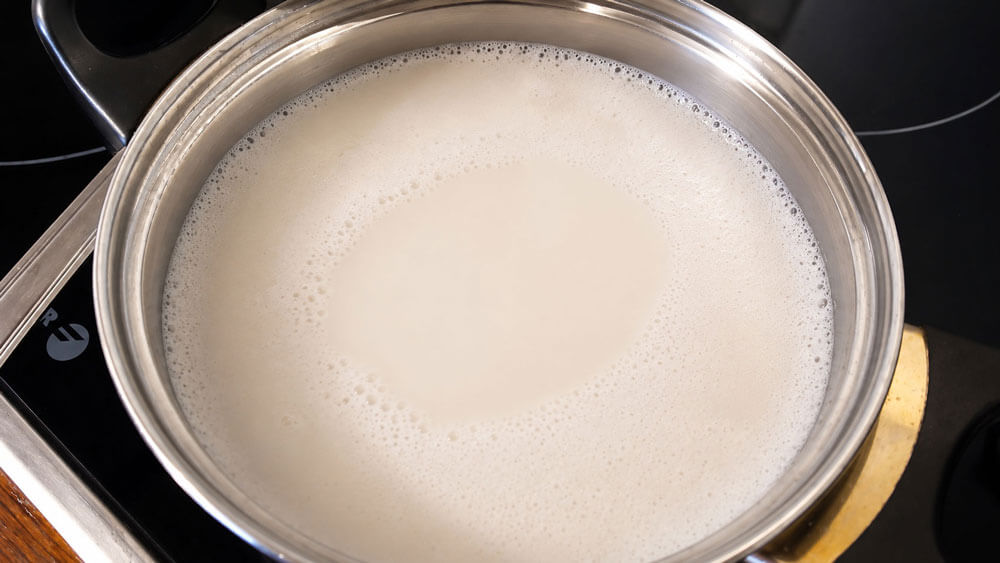
Add the shredded coconut and water to a medium saucepan and bring to a boil over medium-high heat. Once boiling, reduce the heat slightly and continue to simmer for 6 to 8 minutes. This step is key — the heat helps draw out the fats and flavors from the coconut fibers, giving your finished milk more body and richness.
Don’t rush this step. A full simmer ensures you get maximum extraction from the shredded coconut.
Step 2: Let It Cool
Once the coconut and water have simmered, remove the pot from the heat and set it aside to cool for approximately 1 hour. You want the mixture to reach a lukewarm temperature — not completely cold, but cool enough to handle safely.
Why not blend it hot? Aside from the obvious safety concern of hot liquids in a blender, allowing the mixture to cool slightly actually improves blending. The fat molecules in the coconut begin to emulsify as the liquid cools, which helps create a smoother, more cohesive milk.
Step 3: Blend Thoroughly
Once the mixture is lukewarm, pour it into your blender. Blend on high speed for 1 to 2 minutes. You’ll notice the liquid turning a creamy, opaque white — that’s a good sign. The goal here is to break down the coconut fibers as finely as possible, releasing every bit of fat and flavor into the water.
If you have a high-speed blender like a Vitamix or Blendtec, you’ll get excellent results. A standard blender works too, but you may want to blend for an extra 30 seconds or so.
Pro tip: Blend in batches if your blender is small. Never fill it more than two-thirds full with a warm liquid.
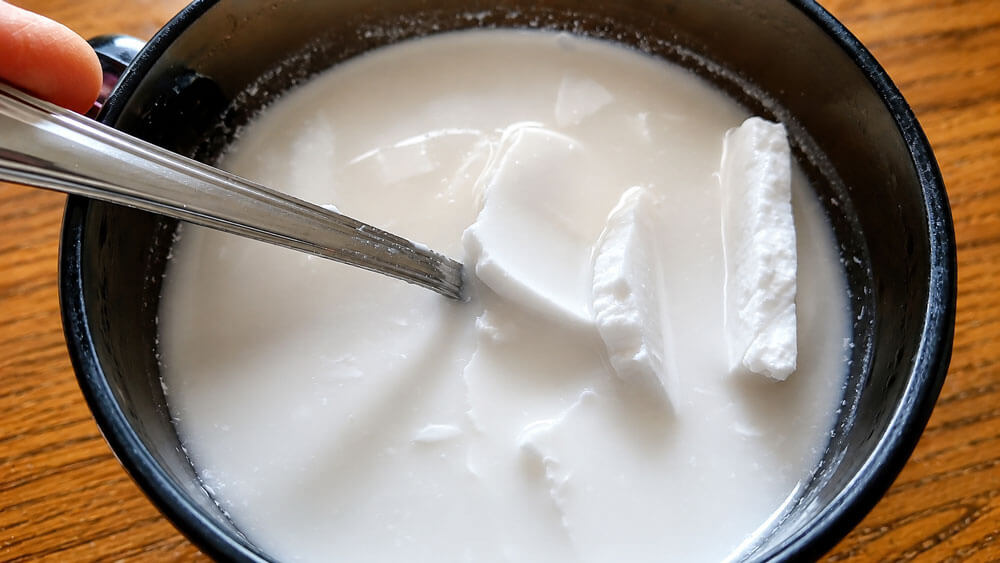
Step 4: Strain the Coconut Milk
Place a fine mesh strainer or nut milk bag over a large bowl or pitcher. Pour the blended mixture through it slowly, pressing or squeezing the pulp to extract as much liquid as possible.
This step is where the magic happens. You’ll be left with smooth, silky coconut milk in the bowl and a ball of damp coconut pulp in the strainer. Don’t toss that pulp — it’s still valuable (see below).
After straining, you should have roughly 500 ml (about 2 cups) of fresh homemade coconut milk.

Step 5: Optional Flavor Additions
At this point, your coconut milk is ready to use as-is. But if you’d like to enhance it slightly, here are a few natural options:
- A drizzle of honey — adds subtle sweetness without overpowering the coconut flavor. Great for smoothies or desserts.
- A splash of vanilla extract — half a teaspoon gives the milk a warm, aromatic note. Excellent for overnight oats, chia pudding, or coffee.
- A pinch of sea salt — counterintuitively, a tiny amount of salt can actually amplify the creamy, sweet notes of the coconut.
These additions are entirely optional — plain coconut milk is wonderful on its own.
SHOP MY FAVORITES
Cute, cozy & aesthetic coffee finds for everyday coffee lovers.


What to Do With the Leftover Coconut Pulp
One of the best parts about making coconut milk at home is the byproduct. The strained coconut pulp still contains fiber and a mild coconut flavor, making it perfect for:
- Baked goods — stir it into muffins, cookies, granola bars, or banana bread.
- Granola — spread it on a baking sheet with oats and bake at low heat for homemade toasted coconut granola.
- Smoothies — toss a spoonful into your morning blend for added texture and fiber.
- Energy balls — mix with nut butter, oats, and a bit of honey for a quick snack.
- Coconut flour — dry the pulp completely in a low oven (250°F / 120°C for about an hour), then blend into a fine powder. It can substitute for a portion of flour in gluten-free recipes.
Nothing goes to waste.

How to Store Homemade Coconut Milk
Homemade coconut milk doesn’t contain any preservatives, so it has a shorter shelf life than store-bought versions. Here’s how to store it properly:
- Refrigerator: Pour into an airtight glass jar and refrigerate for up to 3 to 4 days.
- Freezer: Coconut milk freezes beautifully. Pour into an ice cube tray or freezer-safe container and freeze for up to 2 months. Thaw overnight in the fridge before using.
Note: Natural separation is completely normal. The fat (coconut cream) will rise to the top and solidify in the fridge. Simply shake the jar or stir before use.
Tips for the Best Homemade Coconut Milk
- Use unsweetened shredded coconut. Sweetened varieties will make the milk too sugary for savory applications.
- Don’t skip the simmering step. It’s tempting to just blend and strain without cooking, but simmering dramatically improves flavor and yield.
- The longer you blend, the richer the milk. Two full minutes gives you a creamier result than 30 seconds.
- Adjust water for thickness. Want a thicker, cream-like consistency? Use 500 ml of water instead of 700 ml. Prefer a lighter milk for drinking or pouring over cereal? Add up to 900 ml.
How to Use Coconut Milk in the Kitchen
Now that you have fresh homemade coconut milk, the possibilities are wide open. Here are some popular uses:
- Curries and soups — the classic application. Add it to Thai red or green curry, butternut squash soup, or lentil stew for richness and depth.
- Smoothies — use it as your liquid base for tropical blends with mango, pineapple, or banana.
- Coffee drinks — coconut milk lattes are a dairy-free favorite.
- Oatmeal and overnight oats — cook oats in coconut milk instead of water for a naturally creamy result.
- Baking — substitute for regular milk or cream in pancakes, cakes, and bread recipes.
- Rice — coconut rice (cooked with part coconut milk, part water) is a simple side dish that pairs beautifully with grilled fish or chicken.
Nutrition and Health Benefits of Coconut Milk
Coconut milk is rich in medium-chain triglycerides (MCTs), a type of fatty acid that the body metabolizes differently than long-chain fats. MCTs are quickly converted into energy and have been studied for potential benefits related to metabolism and brain function.
It’s also a good source of manganese, copper, and iron. Because homemade coconut milk is made from whole coconut without additives, it retains the full nutritional profile of the coconut itself.
That said, coconut milk is calorie-dense due to its high fat content, so it’s best enjoyed as part of a balanced diet rather than consumed in large quantities daily.

Final Thoughts
Making coconut milk at home is one of those kitchen projects that seems fancier than it actually is. With just two ingredients, a blender, and about 90 minutes (mostly hands-off cooling time), you end up with a fresh, additive-free product that outperforms anything from a can.
Once you’ve tasted the difference, homemade coconut milk becomes one of those things you’ll want to keep in your fridge on a regular basis. Give it a try — your curries, smoothies, and morning oatmeal will thank you.
