Latte Art Tools: Everything You Need to Get Started
You don’t need a commercial espresso machine or years of training to pull off stunning latte art. You just need the right tools — and a little patience with yourself.
The milk foam is your paint. The coffee is your canvas. And every cup is a fresh start.
Let’s be honest: the first time you try to pour a heart into a latte, it’ll probably look like a misshapen blob. That’s fine. That’s normal. Even the best baristas in the world were there once. What separates the folks who get good quickly from those who stay frustrated? Usually, it comes down to having the right tools from day one.
Of course, practice is the most important part. But we can only do it effectively if we have the right tools for it.
This guide breaks down every piece of latte art equipment worth knowing about — from the non-negotiables you’ll need before your very first pour, to the advanced gear that unlocks more intricate designs. We’ll also cover what to actually look for when you’re buying, because not all milk pitchers are created equal.
What Is Latte Art, Exactly?
Latte art is the technique of pouring steamed, microfoam milk into a shot of espresso in a way that creates a pattern on the surface. The contrast between the dark espresso crema and the white foam is what makes the design visible. The most classic patterns — the heart, the tulip, and the rosetta (or “fern”) — all rely on this contrast.
There’s also etching, a related technique where you use a pointed tool to draw designs into already-poured foam. Both approaches are fun, both produce beautiful results, and both benefit enormously from using proper equipment.
DXN Ganoderma Coffee
The coffee I’ve been enjoying for years for cozy mornings and smoother energy.

Essential Latte Art Tools Every Beginner Needs

Milk Steaming Pitcher (The Most Important Purchase)
If you buy nothing else on this list, buy a good steaming pitcher. This is the tool most directly responsible for whether your pour looks like a work of art or a Jackson Pollock accident. A well-designed pitcher gives you control over the stream of milk — how wide it is, how fast it flows, where it lands.
Look for stainless steel (it conducts heat evenly and cleans up easily), a comfortable handle that fits your grip, and most importantly, a narrow, well-formed spout. The spout is where the magic happens: a thin, precise stream lets you guide the milk exactly where you want it. Wide or poorly shaped spouts make that nearly impossible.
Size matters: For a single-shot latte, go with a 12 oz (350ml) pitcher. Making drinks for two? A 20 oz (600ml) pitcher is your friend. Avoid going too big — excess milk sloshes around and makes precise pouring much harder.
Pro Tip: Hold the pitcher by the handle and tilt it slightly toward you before you pour. This angle helps the foam float on top of the espresso, which is exactly what you want for a clean design.
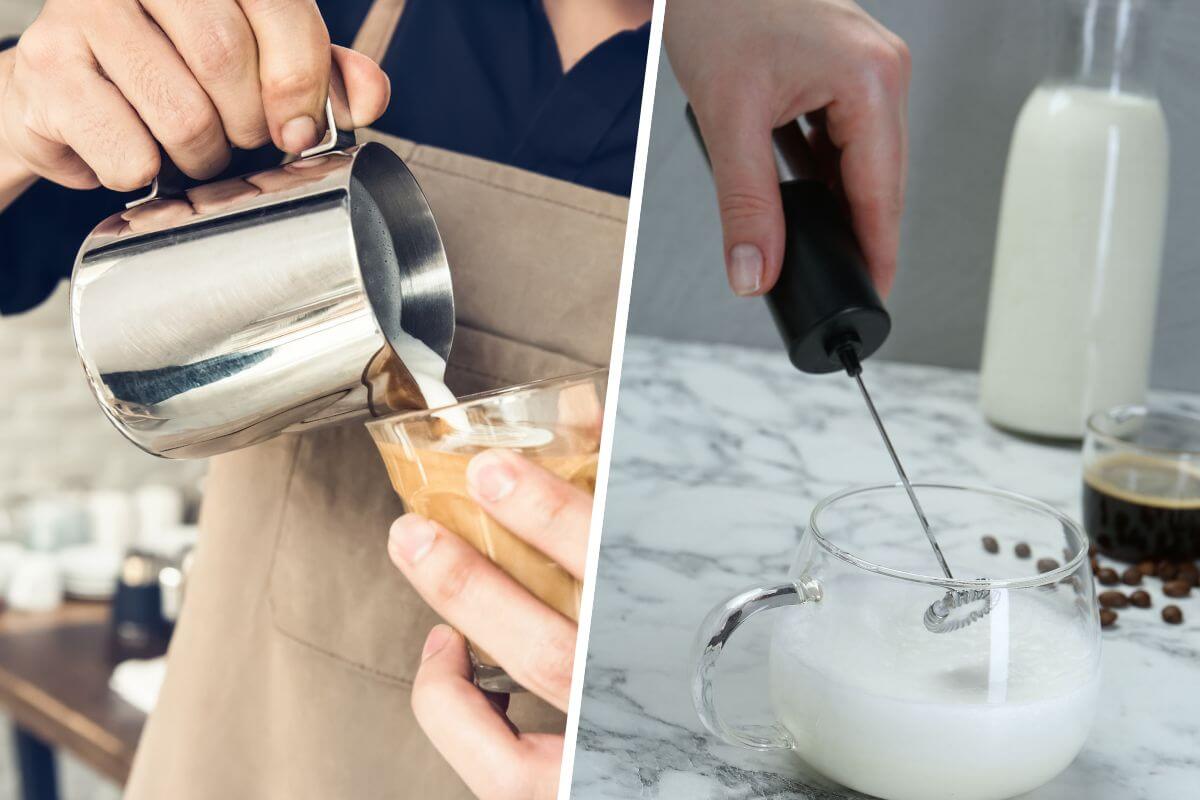
A Steaming Wand or Quality Milk Frother
Latte art lives or dies by the quality of your foam. What you’re after is called microfoam — milk that’s been steamed to around 140–150°F (60–65°C) and has a texture like wet paint or liquid velvet. It should have no visible bubbles. It should pour slowly off a spoon in a single, cohesive sheet.
If you have an espresso machine with a steam wand, you’re already set up for success — just practice the technique. If you’re working with a standalone frother, look for one that both heats and froths simultaneously. Temperature matters a lot here: cold milk won’t integrate with the espresso properly, which means your designs won’t hold.
Can’t find a combination frother in your budget? Heat the milk separately (stovetop works fine — just don’t let it boil) and then froth it. It’s an extra step, but the results are worth it.
Milk matters too: Whole milk (3.5% fat or higher) produces the creamiest, most stable microfoam. Plant-based options like oat milk also work well — barista-specific oat milks are especially good. Skim milk foams up volumetrically but doesn’t hold patterns as well.
Level Up: Latte Art Tools That Make You More Creative

A Latte Art Etching Needle (Barista Pen)
Once you’ve got the basics of pouring down, an etching needle is the first “upgrade” tool that makes a huge difference. It’s essentially a thin, pointed stylus — sometimes double-ended — that you use to draw into the foam after you’ve poured your base design.
With a needle, you can turn a simple heart into a flower by drawing petals outward from the edges. You can add spirals, swirls, letters, or geometric patterns. The learning curve is low, and the results look genuinely impressive.
Beginners love this tool because it gives you a way to “rescue” or enhance pours that didn’t quite come out the way you planned. It also works beautifully on hot chocolate, matcha lattes, and any other foam-topped drink.
Latte Art Stencils
Stencils are the shortcut that nobody should be ashamed to use. You place one on top of your cup, dust the surface with cocoa powder, cinnamon, or colored sugar through the cutouts, and lift it off to reveal a clean, sharp design. No pouring skill required.
The variety is genuinely impressive these days — you can find stencils in the shapes of hearts, stars, snowflakes, animals, seasonal motifs, and more. They’re inexpensive, reusable, and great for entertaining guests who’ll be impressed regardless of how “easy” the method is.
Combine techniques: Use a stencil as a base, then add fine detail with an etching needle. This hybrid approach lets you produce complex designs without needing perfect free-pour skills yet.
Fine-Mesh Shaker / Powder Duster
A small fine-mesh shaker might seem like a minor tool, but it’s surprisingly useful. It lets you apply cocoa powder, matcha, cinnamon, or powdered sugar in an even, controlled layer over foam — much more uniform than just shaking from the container.
Paired with a stencil, a powder duster produces crisp, high-contrast designs. On its own, it’s great for finishing a drink with a professional-looking dusting. Some baristas use flavored powders to add both visual interest and a hint of flavor — a dusting of cardamom on a vanilla latte, for example.
SHOP MY FAVORITES
Cute, cozy & aesthetic coffee finds for everyday coffee lovers.

Advanced Latte Art Gear: For When You’re Ready to Go Further
A Dual-Tipped Barista Pen
The barista pen is a step up from a basic etching needle. It typically features two tips — one fine point for detailed line work and one broader tip for blending and shading larger areas of foam. Advanced latte artists use these tools to create portraits, landscapes, logos, and even photorealistic images in foam.
This is genuinely impressive craft that takes months or years to master. But even at an intermediate level, a barista pen gives you much more precision than a basic needle, and it makes the whole process feel more intentional and enjoyable.
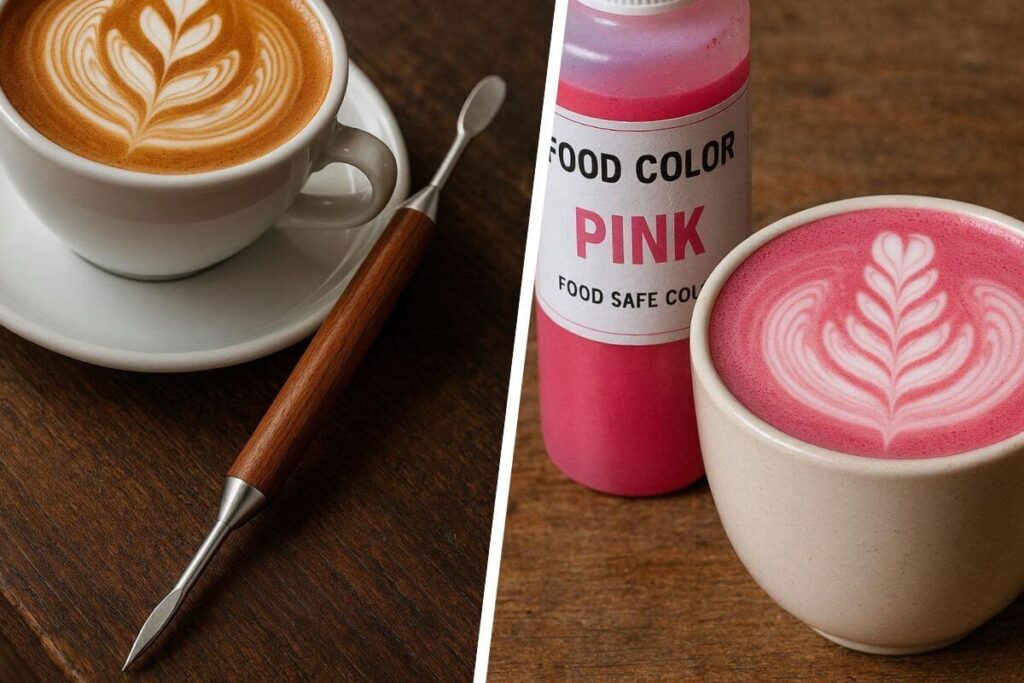
Food-Safe Color Drops
If you want to take your latte art into truly eye-catching territory, food-safe color drops are worth exploring. A tiny drop of pink, green, or blue on white foam creates a striking visual effect that photographs beautifully. Look for natural colorings derived from plants (beet for pink, spirulina for green, butterfly pea flower for blue) over synthetic dyes.
These are mainly used for Instagram-worthy presentation or special occasion drinks. They don’t affect flavor noticeably when used in small amounts. Just make sure whatever you’re using is labeled food-safe and approved for direct consumption.
Beginner Tips That Will Actually Save You Time
- Start with the heart: It’s the simplest free-pour pattern and the foundation for almost every other design. Get this consistent before moving on.
- Use whole milk: Fat content is your friend. The higher the fat, the more stable and velvety your foam will be.
- Don’t skip the tilt: Tilt the cup toward you before you pour. It gives you a smaller surface area to target and makes patterns easier to form.
- Photograph everything: Even your failures. Comparing your pours over time is one of the most motivating things you can do, and you’ll see improvement faster than you think.
- Slow down your pour: Beginners almost always pour too fast. Take a breath, slow your wrist, and let the milk settle into the crema gradually.
- Find a community: There are dedicated latte art communities on Reddit, Instagram, and YouTube. Posting your work and getting feedback accelerates learning dramatically.
Latte Art Beyond Your Kitchen
Latte art isn’t just a home hobby — it’s become an expectation at quality coffee shops, and a competitive sport at the professional level. The World Latte Art Championship draws baristas from dozens of countries, and the winning pours are genuinely breathtaking pieces of edible artistry.
For café owners and baristas: investing in good steaming pitchers and barista pens pays off in customer experience. A beautiful rosetta on someone’s morning latte is the kind of small, memorable detail that turns a first-time customer into a regular. It’s a few seconds of extra effort that creates a lasting impression.
Even at home, there’s something genuinely satisfying about handing someone a cup that looks as good as it tastes. It’s hospitality made visible.
Every cup is practice. Every pour is a chance to get a little better. The milk foam is your medium — what you make with it is entirely up to you.


