The Ultimate V60 Pour-Over Coffee Guide
If you have ever scrolled past a photo of a sleek cone-shaped dripper with a spiral pattern inside and wondered what all the fuss is about, you have already met the V60 coffee maker. Despite the name, this is not an electric machine at all, but a simple manual pour-over brewer that has become one of the most beloved tools in specialty coffee. With nothing more than a dripper, a paper filter, hot water, and freshly ground beans, it can produce a cup that tastes remarkably clean, sweet, and full of nuance.
In this guide, you will learn exactly what the Hario V60 is, how it looks and why it is designed the way it is, which size and material to choose, and what gear you really need. We will walk through a reliable recipe step by step, cover the most common mistakes, explain how to fix a cup that tastes sour or bitter, and compare the V60 with other popular brewers. By the end, you will also know whether this method truly fits your daily routine.
Quick answer
The V60 is a cone-shaped, manual pour-over coffee maker made by Hario of Japan. You place a paper filter in the dripper, add medium-fine ground coffee, and pour hot water over it in slow, controlled stages. A good starting recipe is 15 grams of coffee to 250 grams of water at about 200°F (93°C), finished in roughly three minutes.
What Exactly Is the V60 Coffee Maker?
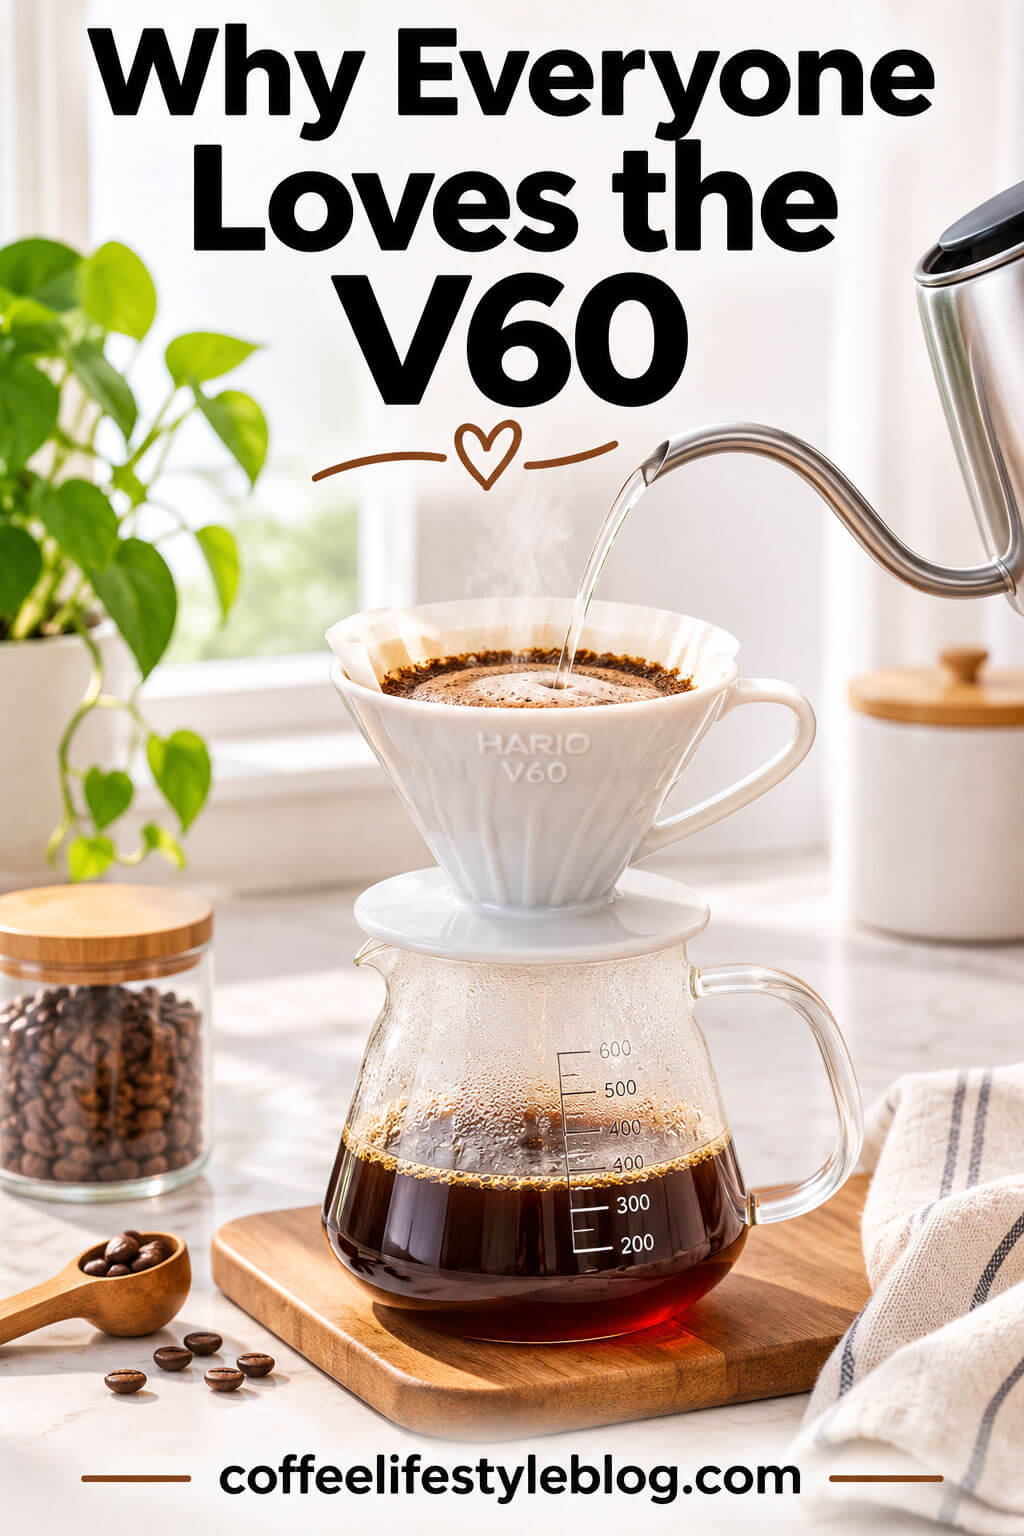
The V60 is a pour-over dripper introduced by the Japanese company Hario in the early 2000s. Hario has been making heat-resistant glassware since 1921, and its name roughly translates to “king of glass,” which explains why the brand approached coffee with a scientist’s curiosity. The “V” in the name stands for the shape of the cone, while “60” refers to the 60-degree angle of its walls. That steep angle encourages water and coffee to flow toward a single point at the bottom, giving you more control over the speed of extraction than a flat-bottomed dripper allows.
Because it is manual, the V60 puts you in charge of every variable that shapes your coffee. You decide how coarse the grind is, how hot the water is, how quickly you pour, and how long the brew lasts. That freedom is precisely what makes it exciting for enthusiasts and, at first, a little intimidating for newcomers. The good news is that once you understand a handful of basics, the method becomes surprisingly forgiving and genuinely relaxing.
What Does a V60 Look Like?
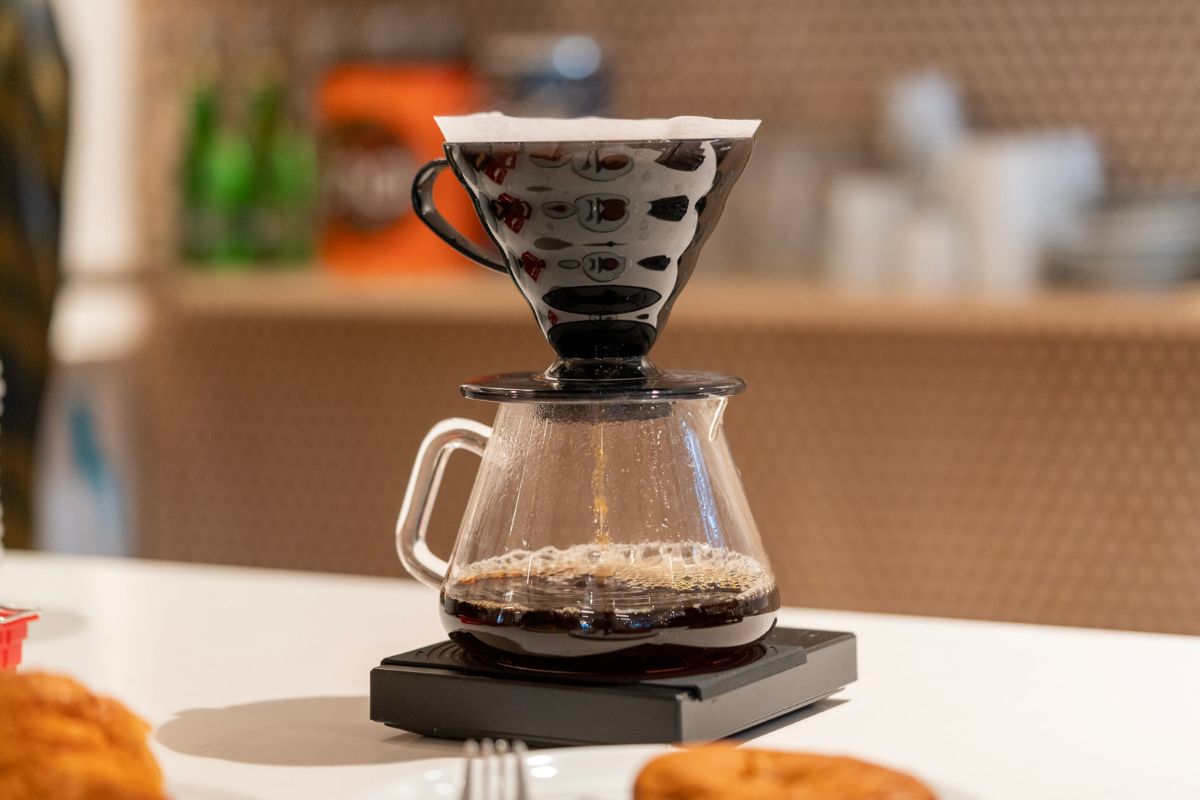
Picture a small, upside-down cone, roughly the size of a large mug or a little bigger, with a wide rim and a small lip or handle on one side. The inside is lined with spiral ribs that run from the rim down toward the base. At the bottom, you will see one large, single opening rather than the several tiny holes found on many other drippers. The dripper sits on top of your mug, a glass server, or a carafe, and a thin, cone-shaped paper filter fits neatly inside.
Each of these design details has a purpose. The ribs lift the paper slightly away from the wall, which lets air escape and keeps the filter from sealing against the dripper so water can flow evenly. The big hole means that the speed of your pour and the size of your grind, not the dripper itself, determine how fast the coffee drains. In other words, the V60 hands the steering wheel to you.
Choosing the Right Size and Material
V60 Sizes: 01, 02, and 03
The V60 comes in three sizes, and the number printed on the dripper tells you which paper filters it needs. The 01 size brews roughly one to two cups and is ideal if you mostly make coffee for yourself. The 02 size handles about one to four cups, which makes it the most popular choice because it works for a solo morning mug as well as for sharing with a guest. The 03 size serves up to six cups and is mainly useful for larger households or small gatherings. If you are unsure, the 02 is the safest all-around pick, though a dedicated solo drinker may enjoy the compact, quick-heating 01.
Ceramic, Glass, Plastic, or Metal?
Material affects heat retention, durability, and price more than it affects taste. Ceramic holds heat well and feels sturdy, which keeps your brew temperature steadier. Glass looks beautiful but is more fragile and loses heat faster. Plastic is lightweight, affordable, unbreakable, and surprisingly good at retaining heat, making it a great choice for travel or a first purchase. Metal and copper versions are stylish and long-lasting but usually cost more. Whichever you choose, rinse and preheat the dripper before brewing, because a cold dripper can quietly pull the temperature of your slurry down and leave the cup tasting flat.
The Gear You Actually Need
One of the pleasant things about the V60 is that the starter kit is small and fairly inexpensive. You can certainly spend a lot more, but a few well-chosen pieces will carry you a long way. Here is what matters most, in roughly the order of how much each item improves your coffee.
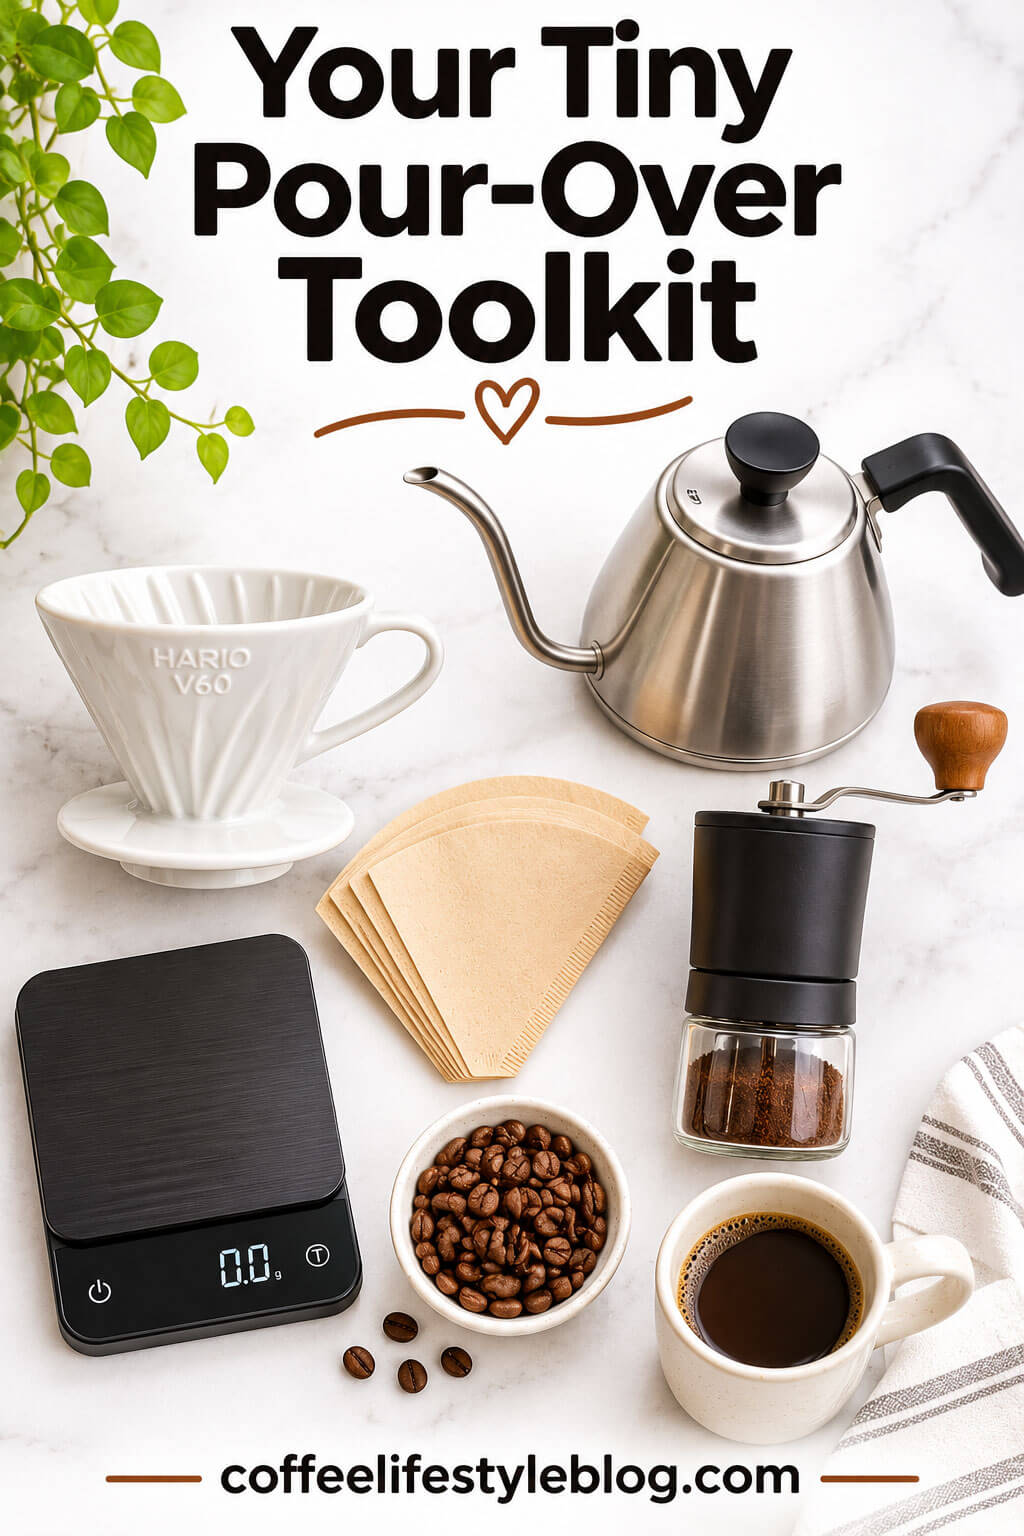
First comes the Hario V60 ceramic coffee dripper itself, together with a stack of V60 02 paper filters, since you will need a fresh one every time. Next, a gooseneck kettle gives you the thin, steady stream that makes gentle, accurate pouring possible. A digital coffee scale with a timer lets you measure coffee and water by weight, which is far more consistent than scoops. Finally, a burr coffee grinder is arguably the single most important upgrade, because even particle size is what allows the water to extract flavor evenly. A glass coffee server is a nice extra, though your favorite mug works perfectly well.
Pro tip: If your budget is limited, spend it on the grinder and the beans before anything else. Freshly ground, good-quality coffee in a basic dripper will beat stale pre-ground coffee in an expensive setup every single time.
The Perfect V60 Recipe for Beginners
Before the steps, it helps to understand the four variables that shape every cup: the coffee-to-water ratio, the grind size, the water temperature, and the total brew time. Dial these in sensibly, and the rest is simply practice.
Ratio, Grind, and Temperature
A friendly starting ratio is about 1 part coffee to 16 or 17 parts water, which works out to 15 grams of coffee and 250 grams of water for one generous mug. If you like a stronger cup, move toward 1:15, and if you prefer something lighter and tea-like, drift toward 1:17. For grind size, aim for medium-fine, a little finer than coarse sea salt and slightly coarser than table salt. Water should be hot but not violently boiling, so somewhere between 195°F and 205°F (90–96°C) is a good window, with the higher end suiting lighter roasts and the lower end suiting darker ones.
Step-by-Step Brewing Guide
- Heat your water and prepare the filter. Bring the water to a boil, then let it rest for about thirty seconds. Fold the seam of the paper filter, place it in the dripper, and set the dripper on your mug or server.
- Rinse the filter. Pour hot water through the paper until it is fully wet, which removes the papery taste and warms your dripper and cup. Then discard the rinse water.
- Add the coffee. Weigh 15 grams of medium-fine grounds into the filter, give the dripper a gentle shake to level the bed, and place everything on your scale. Tare it to zero.
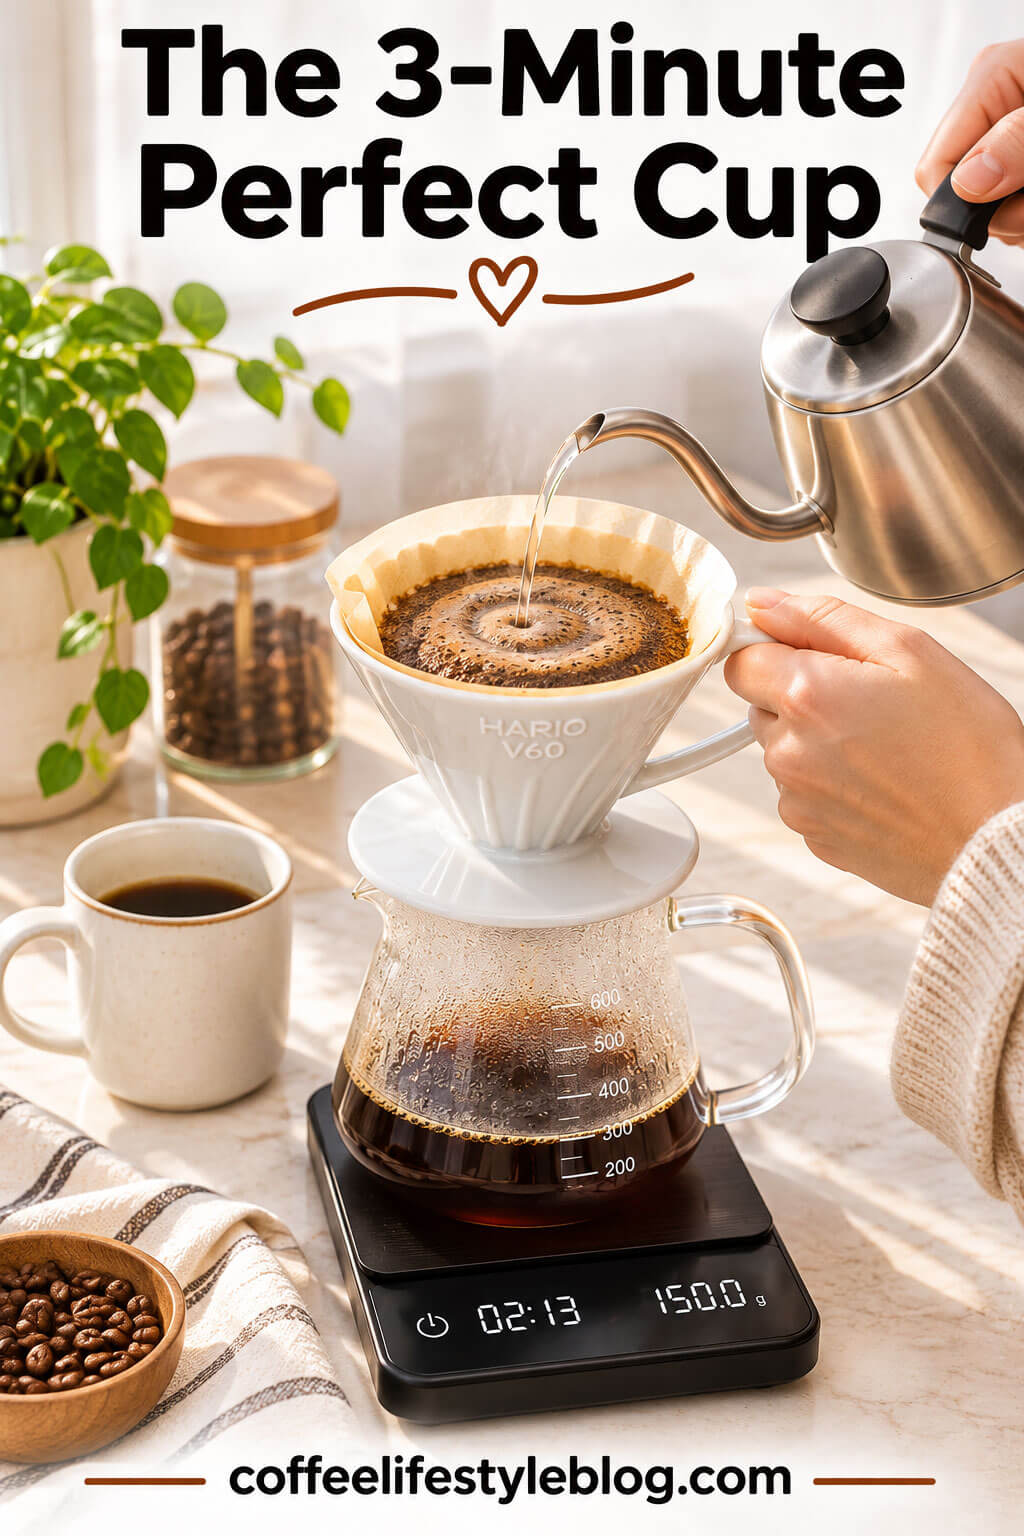
- Bloom for 30 to 45 seconds. Start your timer and pour about 40 grams of water, making sure all the grounds are wet. You will see the coffee puff up as trapped carbon dioxide escapes, and this step is essential for even extraction.
- Pour in slow circles. At around 0:45, pour in a gentle spiral from the center outward and back again until the scale reads about 150 grams. Avoid pouring directly onto the paper walls.
- Finish the pour. At roughly 1:15, add the remaining water until you reach 250 grams, keeping the stream low and steady.
- Let it drain. Give the dripper a light swirl so the bed settles flat, then wait. Total brew time should land between 2:30 and 3:30.
- Serve and taste. Remove the dripper, give the coffee a quick stir, and enjoy it while it is still warm, since the flavors open up as the cup cools slightly.
Popular Pouring Methods Worth Trying
Once the basic recipe feels comfortable, you may want to experiment with techniques developed by well-known coffee professionals. Two methods in particular have become favorites because they are easy to follow and produce a noticeable change in the cup.
The 4:6 method, created by Japanese champion Tetsu Kasuya, splits the water into five equal pours. The first two pours control sweetness and acidity, while the last three control strength, so you can adjust the balance of your coffee simply by changing the size of those early pours. It is a wonderfully logical system for anyone who likes to tinker. The single-pour method popularized by James Hoffmann takes the opposite approach: after the bloom, you pour all the remaining water in one steady motion, then give the slurry a gentle stir and a swirl. It is simple, repeatable, and very beginner friendly.
Common V60 Mistakes and How to Avoid Them
Almost everyone makes the same handful of errors in the first few weeks, and nearly all of them are easy to fix. Knowing them in advance will save you a good number of mediocre cups.
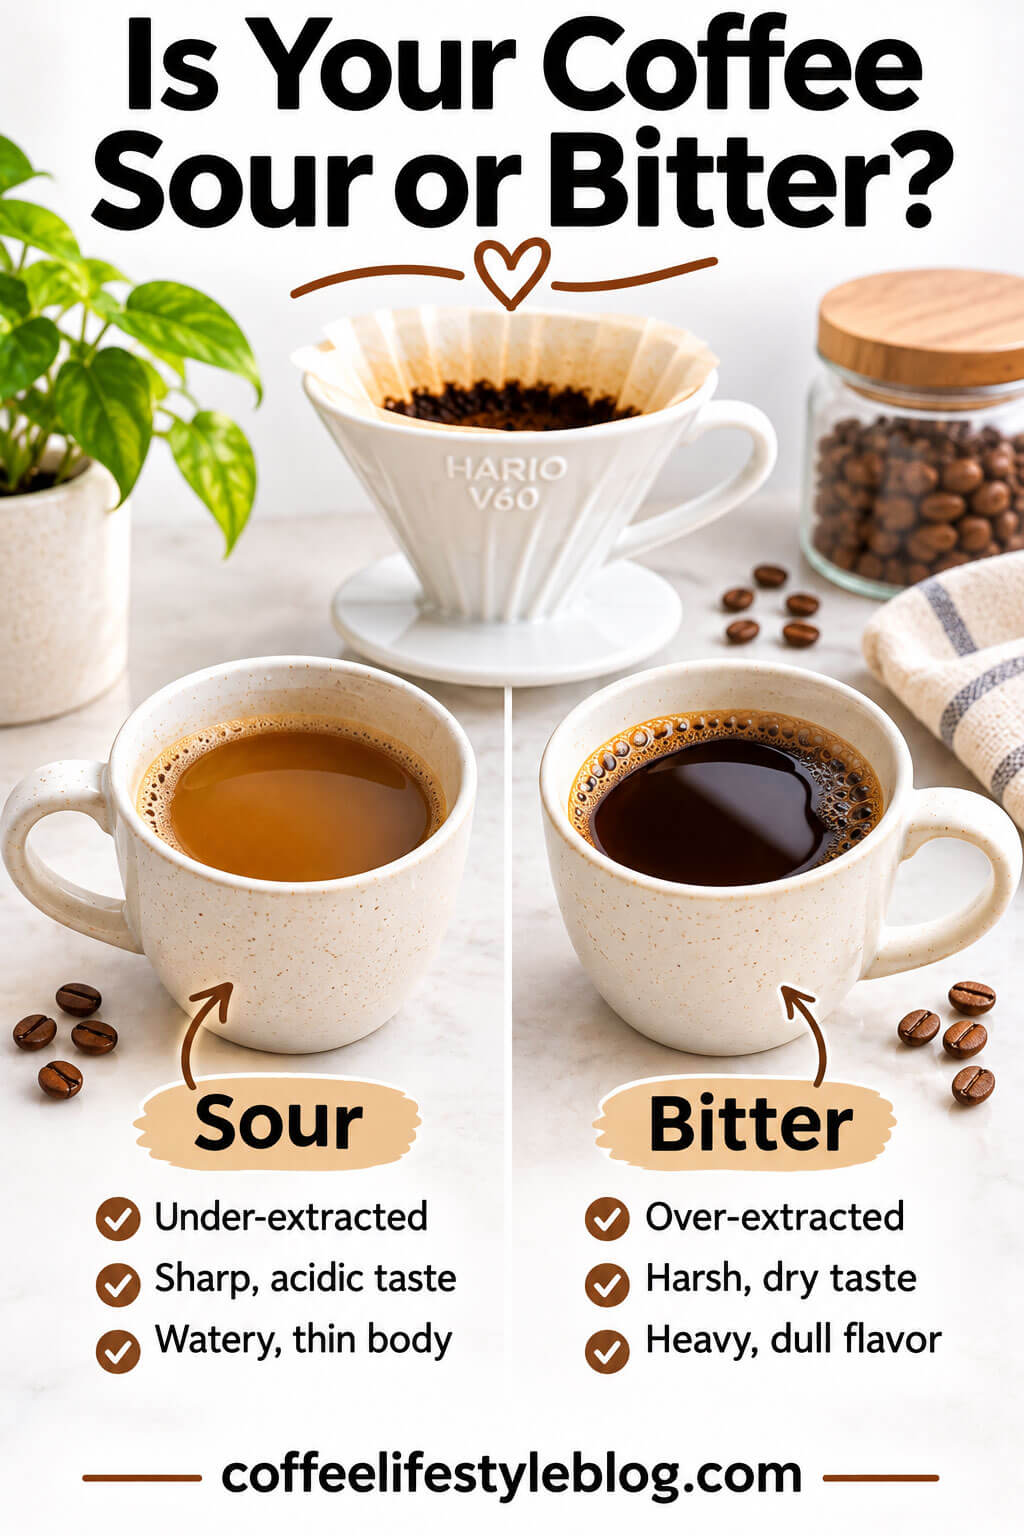
- Using the wrong grind size. Too fine and the water stalls, producing bitter, harsh coffee; too coarse and it rushes through, leaving a thin and sour result. Adjust your grinder in small steps.
- Skipping the bloom. Without it, gas escapes unevenly during the brew and creates channels, so some grounds are over-extracted while others barely get touched.
- Pouring too fast or too aggressively. A forceful stream churns the bed and speeds up extraction unpredictably. A calm, low pour keeps the results consistent.
- Guessing instead of weighing. Scoops vary wildly depending on bean density and roast level. A scale removes the guesswork.
- Ignoring the water. Heavily chlorinated or very hard water can dull your coffee, so filtered water often makes a bigger difference than people expect.
- Using stale beans. Coffee tastes best within a few weeks of its roast date, and whole beans stay fresh far longer than pre-ground coffee.
How to Fix Sour or Bitter Coffee
The beauty of the V60 is that every cup teaches you something. If your coffee tastes sour, sharp, or salty, it is probably under-extracted, which means the water did not pull out enough of the sweet, balanced flavors. Try grinding a little finer, using hotter water, or pouring slightly more slowly so the brew lasts closer to three minutes. If the cup tastes bitter, dry, or astringent, it is likely over-extracted, so grind a bit coarser, lower the water temperature a few degrees, or shorten the total brew time.
Change only one thing at a time, and take a quick note each time you brew. Within a week or two, you will start to recognize patterns, and you will be able to adjust the recipe confidently for different beans, whether they are fruity Ethiopian coffees, chocolatey Brazilian blends, or anything in between.
Cleaning and Caring for Your V60
Maintenance is refreshingly easy. After brewing, lift out the paper filter with the used grounds and compost or discard them, then rinse the dripper with warm water. Once or twice a week, wash it with a little mild dish soap to remove the oils that build up on the surface, since these can turn rancid and affect the flavor of your next cup. Ceramic and glass models are usually dishwasher safe on the top rack, but always check the manufacturer’s instructions. Let the dripper dry completely before storing it, and handle glass versions with a bit of care.
V60 vs. Other Popular Brewing Methods
It is natural to wonder how the V60 compares with other brewers you may already own or be considering. Each one has its own personality, and the right choice depends on the kind of coffee experience you enjoy.
Compared with a French press, the V60 produces a lighter, cleaner cup because the paper filter traps oils and fine particles, whereas a press gives a heavier, fuller-bodied result. Against the Chemex, which also uses a paper filter, the V60 is faster, smaller, and offers more control, while the Chemex is a thicker-filtered, very smooth brew that suits larger batches. The AeroPress is more forgiving and travels easily, but the V60 is better at highlighting the delicate flavors of light-roasted, single-origin beans. A drip machine is the most convenient, yet it cannot match the V60’s ability to let you tune each variable to the bean in front of you.
Is the V60 Right for You?
The V60 is a wonderful brewer, but it is not for everyone, and being honest about that will save you some frustration. It rewards people who enjoy a short, mindful morning ritual, who are curious about flavor, and who are willing to spend a few minutes learning. It is a perfect match if you love tasting the difference between coffees from different regions, if you drink one or two cups at a time, and if you enjoy small, hands-on routines.
On the other hand, if you need coffee in your hand within thirty seconds, brew for a large group every morning, or prefer a thick, heavy, espresso-like drink, a different brewer will probably make you happier. If you are still on the fence, try the quick quiz below, which weighs your habits, taste, and patience to suggest whether the V60 is a good fit.
Is the V60 Right for You?
Answer 7 quick questions and find out if this pour-over brewer fits your coffee lifestyle.
Frequently Asked Questions
Is the V60 a coffee machine?
No, the V60 is not an electric machine. It is a manual pour-over dripper that you use with a paper filter, hot water, and ground coffee. The word “maker” in its common name simply refers to the fact that it brews coffee, and no power or buttons are involved.
What grind size is best for a V60?
A medium-fine grind works best for most beans, roughly similar to table salt with slightly more texture. From there, you can adjust: go finer if the coffee tastes sour or watery, and go coarser if it tastes bitter or the brew drains too slowly.
How much coffee should I use for a V60?
A reliable starting point is 15 grams of coffee for 250 grams of water, which is a ratio of about 1:16.7. You can raise or lower the amount of coffee slightly to make your cup stronger or lighter according to your own taste.
How long should a V60 brew take?
Most recipes aim for a total brew time of about two and a half to three and a half minutes, including the bloom. If your coffee finishes much faster or slower than that, the grind size is usually the first thing to adjust.
Can I use any paper filter in a V60?
You should use filters made for the V60 in the correct size, such as 01, 02, or 03, because they match the cone shape and the 60-degree angle. Flat-bottomed filters do not sit properly and can cause water to bypass the coffee.
Do I really need a gooseneck kettle?
It is not strictly required, but it helps a great deal. The narrow spout gives you a thin, controlled stream, which makes it easier to pour evenly and avoid disturbing the coffee bed. If you do not have one, pour slowly from a regular kettle and be patient.
Is V60 coffee stronger than drip coffee?
Not necessarily. Strength depends mostly on your ratio, not on the brewer. However, V60 coffee often tastes brighter and more flavorful because the method highlights clarity and sweetness, which can make it seem more vibrant than automatic drip coffee.
Final Thoughts
The V60 coffee maker is proof that a small, simple tool can transform your daily cup. Its cone shape, spiral ribs, and single large opening give you full control over flavor, and the process of weighing, blooming, and pouring becomes a calm ritual that many people look forward to each morning. Start with 15 grams of coffee, 250 grams of water, a medium-fine grind, and water just off the boil, then adjust one variable at a time as you learn what you enjoy.
Do not worry if your first few cups are imperfect, because every brew gives you useful information for the next one. With fresh beans, a decent grinder, and a bit of patience, you will soon be making coffee at home that rivals what you would find in a favorite café, and you will have genuine fun along the way.